Seed Saving – the Second Harvest

Seed saving is sometimes called the second harvest, coming after the vegetable harvest is complete.  It is a way to continue to cultivate plants that you particularly liked.  But there are some things to consider, which we’ll discuss below.

The advantages of saving your own seeds for planting next year include:

  • Creating your own “landrace”, a plant that is adapted to your specific area and climatic conditions.
  • Cultivating open-pollinated, non-hybrid plants that you can depend on from plant generation to generation – and share with neighbors.
  • Easy to accomplish, letting one or more fruits (e.g., okra pods) mature and dry on the plant to harvest the seeds.
  • Cheaper than buying new seeds every year, and you get to plant the varieties you liked from the previous year.

To save seeds that can be planted next season, they must come from a plant that is a non-hybrid.  If you bought the original seeds, what type were they?

  • Heirloom – these are seeds that have been passed down within a family or a community for several (seed) generations.
  • Open pollinated – these are plants that are pollinated naturally with no intervention:  by wind, birds, or insects.
  • Landrace – seeds saved from generation to generation, cultivated and adapted to a particular place.
  • Hybrid – these are seeds that are a genetic combination crossed by human intervention of more than one type of species; consequently, they will not grow “true” to what you want.  These seeds probably cannot be saved and replanted successfully – you may get something you didn’t expect.

For most seeds, you can just take the seeds from the plant, dry them, and store them in a paper envelope (I use the return envelopes that come with billing statements – I seal them, cut off about an inch, label with seed type and date, and staple or tape closed).

Some seeds, like squash seeds, you’ll need to wash and dry before storing as mentioned above.

Tomato seeds need special treatment. First put the seeds in a jar of water.  Let sit for a day or so, and you will see that some seeds float to the top and others sink to the bottom.  This is a fermentation process, and the seeds that float to the top can be gathered and tossed out.  Once the seeds have separated themselves, drain the water and lay the seeds that sank out to dry.  Then store as above.

It’s important to store the seeds in a cool, dry environment.

That’s it!  You can reuse them next year!
When Leaves Start to Fall

As we’ve experienced the first hard freezes (in Tulsa, 10/30-31/19), the leaves on trees are starting to turn, and will be falling.  That’s when lots of people rake them up, put them in bags, and leave on the curb … for folks like us to pick up.

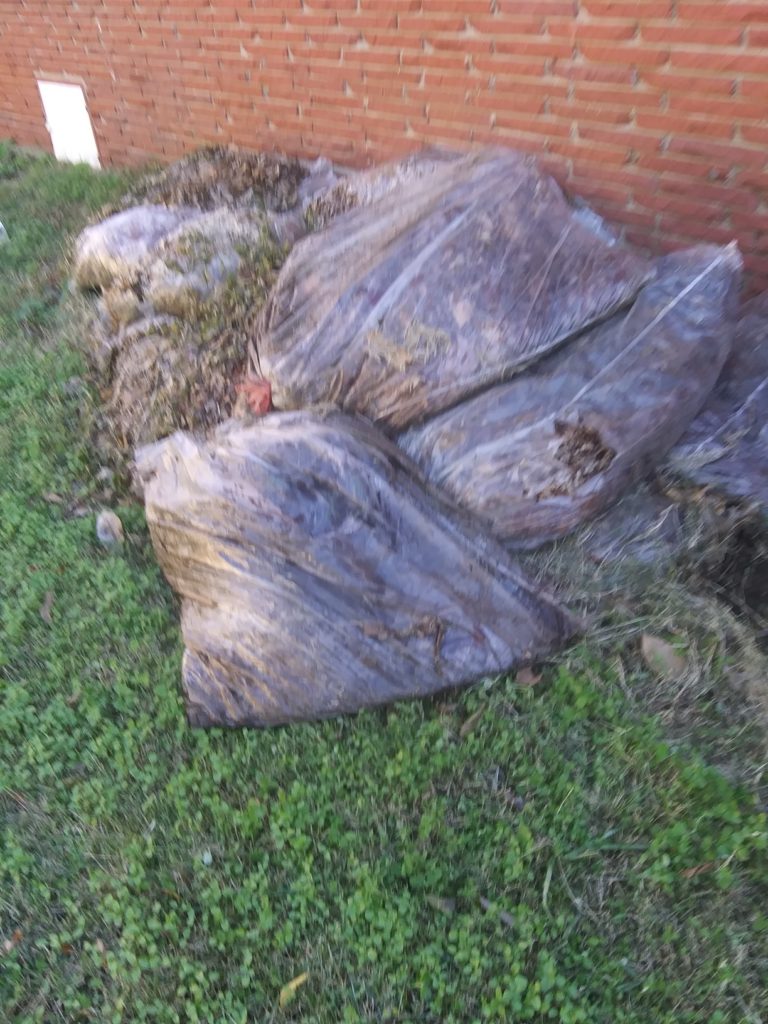
Last year, I brought bags of leaves home and piled them in the backyard. 

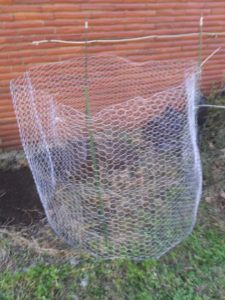
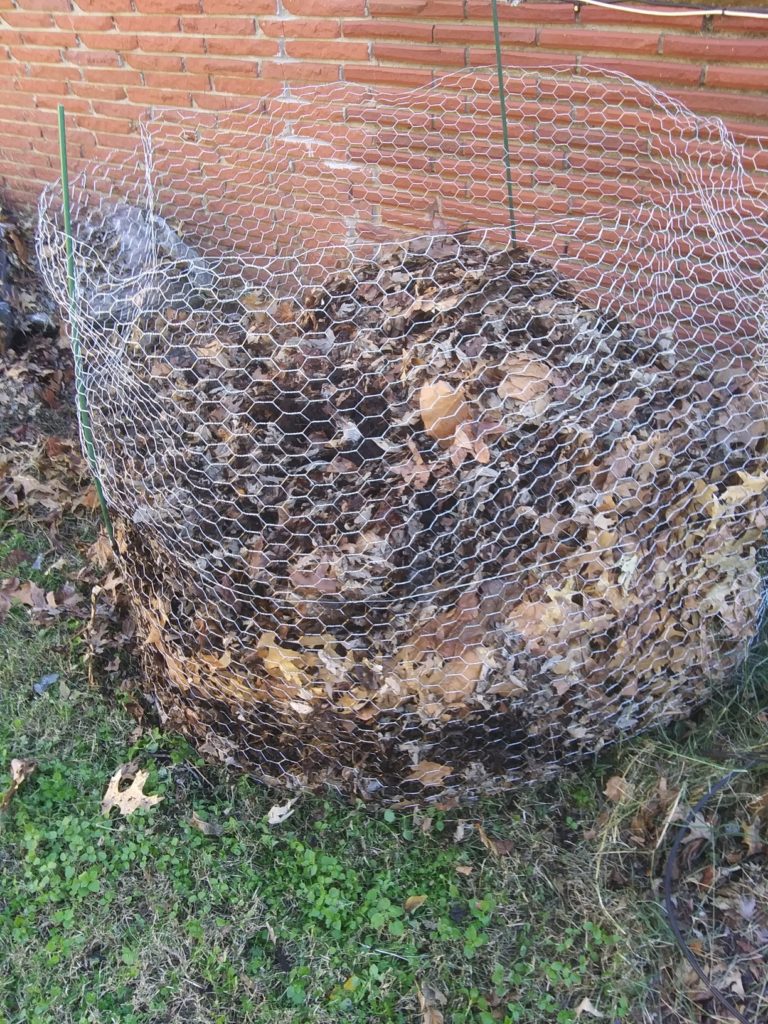
This year, though, I’m building a leaf corral (or two or three) of chicken wire (poultry netting) and turning the leaves into the corrals.  You can see my new corral with about 7 bags of leaves from last year.  The 3 ½ foot diameter corral can hold at least 10-12 bags of leaves.

The corral is made of about 12 ft. of chicken wire held together with zip ties and strengthened into upright position by plastic coated plant stakes.

7 bags of leaves emptied into corral

Why leaf corrals and keeping leaves?  LEAF MOLD!!!

Leaf mold is different from compost. Compost heats up and is a bacterial action. It’s recommended to turn compost often to help aerate and keep the action going. Leaf mold is cold, and fungal action in nature. It takes longer, up to a year or more, but is an incredible soil amendment.

Tree roots go deep, and pull up minerals from deeper soil horizons. These minerals get transferred to the leaves and when the leaves decompose, and are put into the soil, then those minerals become available to plants in the upper horizons.

What minerals you say? Try calcium, magnesium, phosphorous, and potassium. And beyond that, the leaf mold increases the water holding capacity of soil as well as making it fluffy. Tests – both official and by individuals – indicate the leaf mold increased soil water holding capacity by almost 50 percent! That means your plants growing in the soil will be more drought-tolerant.

So how do you accomplish this? It’s simple. Gather the bags of leaves on the street. Make sure they are clear bags, and contain only leaves – not other junk (I once found a few shards of glass in a black plastic bags of leaves). Construct a leaf corral of about 12′ of chicken wire – I use 3′ high chicken wire, so that I can lift the bags of leaves over it to dump them. I connected both ends of the chicken wire with zip ties, and anchored this corral with some plant stakes woven through the holes in the wire.

Now dump leaves into the corral until it’s full. Make another corral if you have more leaves. Then leave them alone for a year. Check to see if you have deep dark rich humus. Then use it as mulch for your plantings.

New Home New Compost Pile

So … I haven’t posted much for the past several weeks –  I moved from Dallas to Tulsa, and have just moved into my new home.  The yard is great and has lots of sun, a blank slate to be filled with permaculture raised beds!  But first …  a compost pile!

I had accumulated scraps for the past few days, and need to get composting going quickly.  Since I don’t have a formal layout yet for the yard, I wanted to do a quick, movable compost pile.  That means a simple wire cylinder!

Step 1:  get wire at hardware store (hardware cloth is what it is called)

Step 2: unroll it, straighten it out, then roll it “backwards” into a large cylinder.  Since the wire ends were not too cooperative, I ended up “sewing” the ends together with the thin wire that helped hold the roll tight in the package.


Step 3: Place cylinder on ground, and lay in brown.  Now, I don’t have any leaves, my favorite “brown.”  But I had some newspaper and so I shredded it (it’s what is also used when starting a worm composting bin, so I figure it might just attract some worms to the pile).  That was the first layer.


Step 4: Add kitchen waste.

Step 5: Top with more shredded newspaper (brown).

Step 6: Wet it down a bit. Now, this was probably not necessary, since we have had a fine rain most of the day, and expect more over the next few days.

And there you have it!  A functioning compost pile for food waste (and leftover newspaper).  I’ve accomplished something at the end of Week 1!


Barrier Free Gardening for the Aging, Mobility Challenged and Others!

I just got the final agenda for Tarrant Area Food Bank’s annual Dig Deep conference on community gardening and urban agriculture.  Find out how to set up and run a community garden, rain harvesting, vermicomposting and community organization!  And then I’ll be giving the presentation on Barrier-Free Gardening!  I am so honored to be a part of the stellar line-up!  Here’s a link to the registration page.  It’s Saturday, July 16, 2016.  See you there

https://www.eventbrite.com/e/dig-deep-a-conference-for-growers-registration-24602726417

Weather Signs When You Don’t Have Your iPhone

Several years ago, I was camping in SW Missouri.  We had arrived the night before, and in the morning as the group was preparing breakfast, I happened to look down the meadow at campfire smoke at another campsite.  The smoke went up straight, and then leveled out as though it was hitting a ceiling.  I mentioned that we were in for some rain.  Everyone thought I was crazy, because there was a clear blue sky…no cloud in sight.  As the morning wore on, clouds starting blowing in and by evening we were drenched.  The next morning, while we were trying to get the wet wood to ignite, I was asked if the rain would continue.  I looked down the meadow and saw the smoke rising a bit and wafting up and over and around in a crazy generally upward pattern and stated that I thought it might just let up during the day.  Sure enough, we had no more rain.  I was lauded as a weather guru, but it was all in how to read the signs that are around us. And I’ll share them with you.  I wish I could say I had noticed all these signs myself, but I read this delightful little book that talked about reading the clouds and, particularly, the animal and plant signs.

Last week, on the last day of Earth Day Texas, the organizers closed the event about a hour earlier than scheduled.  They said a bad storm was coming, and a tornado watch was issued.  We packed up our booth, and headed to our cars.  But the skies didn’t look that threatening. As the lawn had lots of clover among the grass, I eye-balled the clover.  The leaves had not turned over – which they do ahead of approaching rain.  As it turned out, no bad storm passed through our area that night.

This week, as I was driving north to Oklahoma on a rainy, stormy day, it just wasn’t a good idea to pull out the smart phone and check the weather radar.  But I wanted to know if I should pull out on the next exit or could travel on…

The answer was with the cows in the pastures …  When a storm is approaching, the cattle will start congregating in a group, usually in the farthest corner of the pasture from the storm.  They will lie down with their tails to the approaching weather.  Watch the cows.

Some dogs will start panting rapidly as the air pressure increases.  I had a beagle I called my weather dog, because I would go to let her out sometimes and she would get to the door, pause and turn around…Nope…not going.  Sure enough, it would rain soon after that.

Flies and birds will settle just before a storm, and you have probably noticed that sounds travel differently, that it almost seems quieter just before a storm.

So…watch the animals and plants, and observe what is going on around you.  I think you will feel amazed at what you notice.  And it will give you time to plant the last things into your garden, or know when to tie things down to prevent damage.


Gardening During Drought – Part I

As I was driving through Plano the other day, I was thinking of California, which is in the news with state mandated water restrictions.  There are signs on most well-travelled roads that watering restrictions are in force.  Water conservation is good any time, but with a continuing drought, we have to re-think how we garden and how we water.

There are a number of ways to reduce watering when installing/replanting a garden.  First, the more organic matter that is in the soil, the more it will hold the water it gets.

Sometimes folks use things to break up the soil and aerate it, but don’t realize that it isn’t helpful for holding water.  Peat moss has been the favored clay loosener, but I was reading the other day that peat pots tend to cause soil to dry out faster – leading to more frequent watering.  Does that mean that it also doesn’t hold water as well when mixed in the soil?  A better amendment for potting is sustainably harvested coco fiber – it also holds water quite nicely.

What’s that?!

Coco fiber is that fiber on the outside of a coconut.  It comes in bricks and I’ve seen them available at local garden nurseries such as Redenta’s as well as North Haven Gardens.  The bricks are made of fibers that are dehydrated and compressed. The fun part is when you put that brick in a LARGE container to rehydrate (not the regulation 5-gallon bucket, which I heard one person busted during the rehydration process, because it wasn’t large enough).  Put water in the water in the container with the brick and watch what happens – it’s great for kids to participate in this process.  If you want to get mucky, start massaging the fiber off the brick into the water – you get a slurry of muddy mass.  THIS is what you use to mix into potting soil or into raised beds to loosen clay, aerate the bed, and provide moisture retention.

Because the coco fiber does hold moisture – you just witnessed this quality when you rehydrated it!

So we need organic matter – that also means compost and lots of it!  If you haven’t started your compost pile, now (whenever now is) is the best time.  Never too late.  I’ll write another week on compost piles – the slow, the soon and the real quick methods. You can also buy compost (bagged or by the pickup load or by the dump truck load) from folks like Soil Building Systems.

Organic matter – lots of it.  That’s number one.

Then there’s mulch.  Lots of it, too.  Mulch can be bagged stuff you get from the nursery, or delivered by the dump truck, or gathered yourself on the side of the street (read:  leaves in bags). You can also buy straw (not hay) to use as mulch.  Newspapers work, as does cardboard, spread around your plants and watered in well and then covered with leaves (watered in well also).

Leaves make excellent mulch.  Think of a forest floor and how the leaves carpet the ground, keeping it moist and soft, then deteriorating and becoming part of the soil.  Leaves are also free.

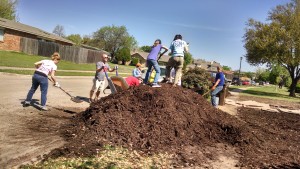
I should note here that if you get a dump truck load of mulch, you might want to invite some friends over to help you distribute it.  Here’s a picture of a mulch-spreading party this last weekend.

Mulch mountain

Mulch is magic.  It serves many purposes – first, it keeps weeds down (yay! less work!).  Second, it shades the soil so that the plants’ feet stay cool even in the hottest baking sun.  That means less water, because it prevents the soil from drying out.  And third, mulch condenses moisture from the air during the night, bringing more moisture to the soil and your plants.    (NOTE:  Do not use cedar bark mulch on vegetables – it’s best used in ornamental plantings.)

All that compost and mulch results in less watering needed to keep your garden going and producing.

In doing some calculations for a community garden’s rain water collection needs, I read that 100 sq. ft. of conventional vegetable garden needs 60 gal. a week at 60 degrees Fahrenheit.  Obviously as the temperature goes up, more water would be needed.  I couldn’t find any figures for how much mulch and organic matter reduce that, but I’ll bet it’s quite a bit – maybe as much as 50%.  Be kind to your water bill – and conserve.

In Part 2 (next week) I’ll talk about how we can build garden beds that require even less water.

Straw Bale Gardening Class Postponed

Due to weather, we’re postponing the Straw Bale Gardening Class until next Saturday (March 7).  The weather is deteriorating, it’s not supposed to be above freezing today and freezing rain expected tomorrow.  Not good for driving.  We don’t want folks risking life and limb to attend the class.  Stay warm and off the roads as much as possible.

Contentment is….

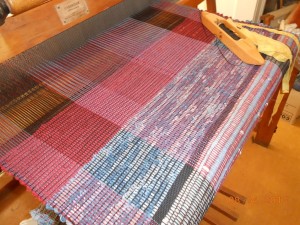
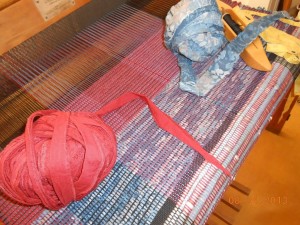
Don’t know when I’ve felt so content and peaceful.  Weaving on Rug #2, a combination of deep blue/grey print sheet and a deep rust red.  In the background (thank you Best Buy for new speakers!) I have music playing – of course it’s Nama Orchestra’s Best, a compilation of their folk dance music.  Brings back pleasant memories of folk dancing with the village friends!

Here’s the rug with the first two stripes finished.  Have to call it quits for today – the light is fading and it’s best to weave with natural daylight.

Fabric Destashing Extravaganza!

Friends, I’m destashing all that fabric that’s been in my closet for the longest time.  All fabrics are from nonsmoking home.  I acquired them with the intention of making clothing for me and my kids when we were active in Civil War reenacting. 

Please email me (anitam48@gmail.com) with a number corresponding to the piece you’re interested in, and where you are.  I will weigh for shipping and send you a PayPal invoice.  Alternatively, if you live in the Dallas area, I am willing to meet you within a 40 miles radius and deliver. 

Individually, the pieces would cost $283.50.  However, if you take the lot, the cost is $200 plus shipping.

Here’s the list:

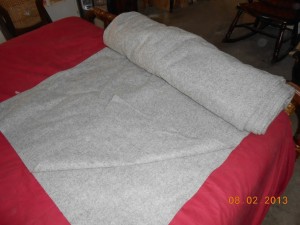
#1 – Grey melton, wool. I wanted a great coat so badly, and was going to fashion one for those cold winter encampments. 60″ wide, 6 yds.  $5/yd = $30

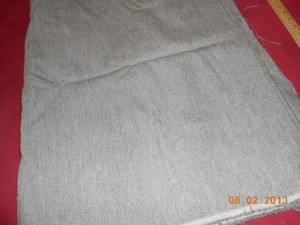
#2 – SOLD – Grey Linsey/Woolsey – 60″, 2 1/2 yds @ $5/yd = $12.50
This is a piece of a special order woven for Confederate impression.  It could make a pair of pants for a young man who wants to look like his dad.

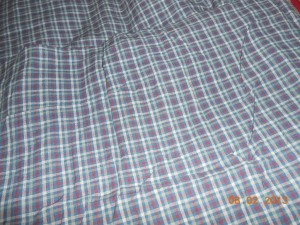
#3 is a lightweight cotton plaid – dark red, cream and blue. It was going to be a summer-weight dress.  It’s 45″ wide, and there are just over 6 yds.  I’m asking $2/yd so that’s $13 for the piece.

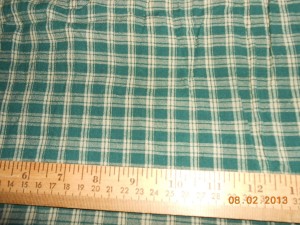
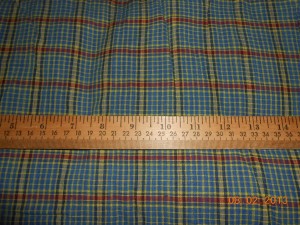
#4 is another plaid – a green and cream cotton, 42″ wide, and there’s about 9 yds in the piece.  This was another dress – probably for my older daughter who looks so good in greens!
At $2/yd that’s $18.

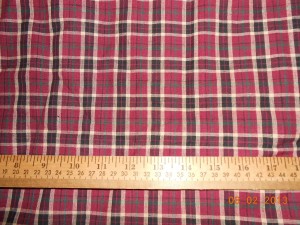
#5 is a lightweight cotton plaid, with red, black, gold and white.  The piece measures 6.5 yds of 45″ fabric.  At $2/yd that’s $13.

#6 is a cotton plaid of green, blue, cream and dark red.  It’s 45″ and  measures 8 yds; at $2/yd it would be $16.

#7 is a cotton plaid of red, black and cream with a green accent.  It’s 45″ wide and just over 8 yds long.  $2/yd = $16

#8 is a cotton plaid of blue and cream with a dark red accent.  It is 42″ wide and consists of two pieces:  One is 6 1/3 yds and the other is 1 yd.  At $2/yd, I’ll say $14.50.

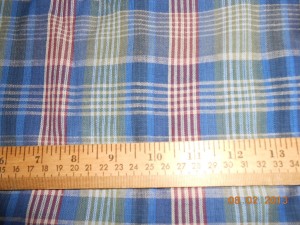
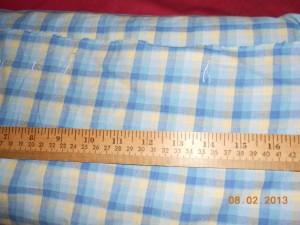
#9 is a plaid of light blue and pale yellow.  I had gotten a pattern for an 1880s day dress and make it up in a darker check.  When I read the documentation of the dress the pattern had been taken from – it was a light blue and pale yellow plaid!  Sure enough, I had it in my closet.  But never made the other dress.    It’s of cotton, 44″ wide.  There are 10 yds in this piece.  $2/yd = $20

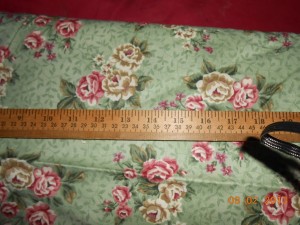
#10 is a green floral cotton with large roses, 44″ wide and 11 yds long.  $2/yd = $22


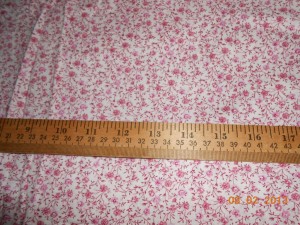
#11 is a small pink on white floral cotton.  It says on the margin, “Concord fabrics 25th anniversary special edition country floral.”  It’s 42″ wide and there are two pieces:  one is 5.5 yds and the other is 1.5 yds for a total of 7 yds.  $2/yd = $14

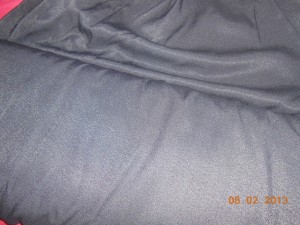
#12 is a black crepe-type fabric.  It’d thought about making a mourning dress of it, because it drapes so well.  The content is undetermined.  It’s 60″ wide and there are 11 yds in the piece.  At $3/yd so it would be $33 for the piece.  Sorry – the camera shows it as grey, but it is pure black – it must be the texture that is causing the reflection.

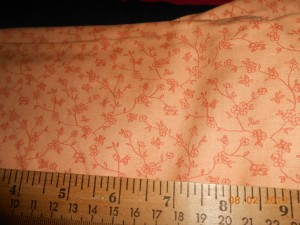
#13 is a lovely orange floral cotton.  It is 45″ wide and a little over 7.5 yds.  @$2/yd, that’s $15.

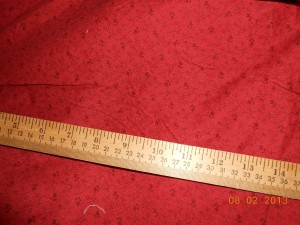
#14 is a small dark red floral on lighter red.  It’s scrumptious.  Cotton, 42″ wide.  There are 4 yds, so that would be $8.

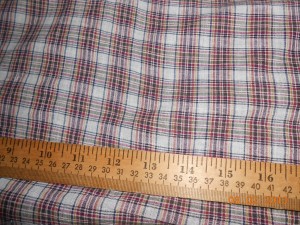
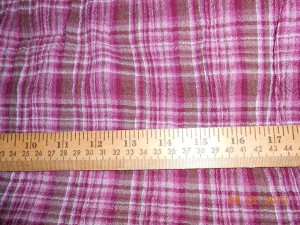
#15 is a light cotton plaid with purplish red as the dominant color.  It’s 36″ wide and there are just over 5 yds in the piece.  I’ll only as $1.50/yd for this one.  That’s $7.50 for the piece.

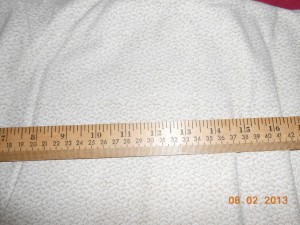
#16 is a small tan print cotton.  Very subtle and lovely.  It’s 44″ wide, and 7.5 yds long.  At $2/yd that’s $15.  Well, it looks more white – sorry – the tan just didn’t show up well. 

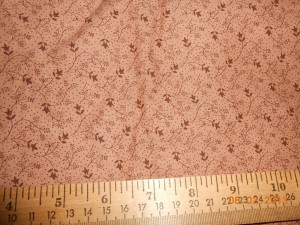
$17 is a brown on brown small floral cotton, 42″ wide.  It’s 8 yds long so at $2/yd that’s $16.

There!  That’s the lot out of that closet!  Again, let me know what you’re interested in (email to anitam48@gmail.com) and I’ll weigh it for shipping costs and send you a PayPal invoice.  Or you could pick it up in Dallas.  If you buy the lot or several pieces, I could even be persuaded to meet you within a 40 miles radius of Dallas. 

Happy sewing!

Anita