INTERPLANTING FOR TWICE THE HARVEST; UPDATE ON MICROGREENS

Interplanting is a technique that is used to obtain twice the harvest from the same space.  For instance, I will plant root vegetables (that use the growing horizon under the surface) with a leafy vegetable (that uses the growing horizon above the surface). One combination I use is carrots and mustard/chard/spinach.  Another combination I like is turnips with bok choy. 
 
Greens
I winter plant my carrots in the midst of other plants (e.g., greens) because the greens protect them (it’s called using nurse plants) until the nurse plants are harvested – usually about the time the carrots are ready to take off (in January and February). That way, I get bunches of carrots when I’m getting ready to plant the spring garden. 
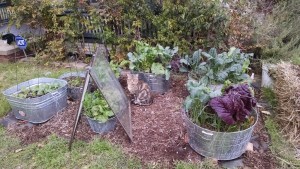
Meanwhile, the greens in my outdoor garden are getting larger.  Every time I harvest some, it seems more grow to take their place.  The red mustard must be at least 15-18” high!  The lettuce is about to bolt, so it’ll go into my salads this week.  I think I’ll plant more red mustard for the color as well as the nutrients.  Of course, the kale is happy, and I see the carrots are starting to take off.
Work is continuing on the compost pile, while the microgreens grow higher – selectively. 
compost-2Bturning
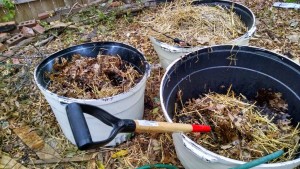
I decided to use three containers for the compost pile, especially since I had 2 containers’ worth of leaves and chicken coop straw.  With a third, I was able to turn the first pile and make sure it was moist.  Green matter from the kitchen was added and mixed in well.  I was able to use a short-handled fork – one that is commonly used to turn over garden areas.  The second container will now be turned into the first, which is now empty.  I’ll probably cover the “completed” one to let it heat up; but I’ll continue to turn it on a weekly or bi-weekly basis to make sure it’s aerated.
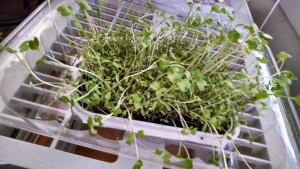
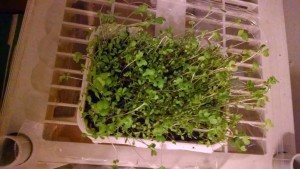
The microgreens are about ready to harvest with kitchen shears – at least SOME of them are.  I’ll have to taste them to determine which ones are the fastest growing.  I may share some of these with my chickens. In fact, I’ll probably prepare another tray of microgreens just for them.  At the rate the greens are growing, I could start a tray about every week or two and have a steady supply of tasty salad add-ons throughout the winter!

micro-2Bgrns-2Bwk-2B2

Compost – Otherwise Known as Plant Vitamins

Compost is one of the “vitamins” we offer our plants.  
Compost can be made in a large bin (e.g., 4’x4’ pallets), a wire bin, a tomato cage lined with wire mesh, a trash can (DIY compost tumbler). The important thing is to keep the mix of brown and green, keep it moist (like a sponge) and keep it turned/aerated.
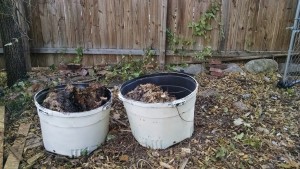
I wanted something smaller for my composting, something I could move about if needed.  Since I had a number of containers used by landscapers to transport trees, I decided to repurpose them.  They are a decent size – about 30” in diameter and about 18-20” deep.  They also have drainage holes in the bottom. 
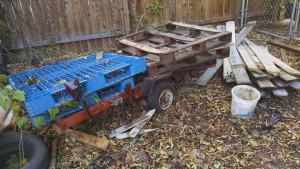
I wanted them closer to the back door than the compost pile I had 25 years ago, because the easier the access, the more likely I am to deposit food waste into it.  However….the spot was occupied by an old utility trailer covered with scavenged fence pickets.  I spent the afternoon removing nails from the pickets and stacking them elsewhere. 
Trailer
A friend helped me to move the trailer out and the bins in.
Now, the bins already contained leaves from last fall, so I had a head start on the brown for my piles.
Bins-2Bcompost
 A compost pile needs four things:  carbon materials (“brown”), nitrogen materials (“green”), air and water (50-60% moisture content).  If the pile is dry and doesn’t decompose or heat up, it has too much brown or not enough water.  The pile should be moist so that, when squeezed, a few drops of water come out. If the pile is slimy and smelly, it has too much green or wet, and needs more brown and aeration (turning). The rule of thumb is 3 parts brown to 1 part green.
I have the brown, and cleaned out the chicken coop, which gave me some nice chicken manure rich in nitrogen.  I’m also picking up some additional “green” from a friend who has too much of it.  There are also a couple of bags of coffee grounds my daughter brought over from Starbucks, so with some water for moisture I have a good start for composting!
For turning, since the bins are closed on all sides, I found a couple of grill lifters on clearance from Target.  They look like angled forks, and should work sort of like tossing a salad. 
So….what can I include as browns? Well, cardboard (shredded is best), wood ashes (but not much), dead, woody plants (chipped/shredded trees, brush), leaves, grass (brown only), sawdust, straw, dryer lint, vacuum cleaner waste, paper or wood products (e.g., shredded newspaper, magazines if not too much slick paper) and natural fibers (like 100% cotton, wool, silk).  The greens – nitrogen sources – include grass clippings, hay, fresh green leaves, manure, kitchen scraps (no meat!), coffee grounds and tea bags (make sure the filters are biodegradable.
When putting items on the compost pile, think smaller – break or shred or chop larger items so that there is more surface area for the microbes to act upon.  The bigger the pieces of material, the longer they take to break down.

When you turn your pile, break up any clumps that you find.  Turn the pile often – this keeps the pile aerated and anaerated pile heats up with the microbial activity.  And you’ll know when it’s done because it will be crumbly black and rich, and smell earthy.

And, most importantly, turning the pile  keeps the critters out!
UPDATE ON THE MICRO-GREENS
The micro-greens I talked about last week sprouted within two days! I have watered by placing the grow tray in a larger tray with water. This lets the medium and plants soak up what they need. I leave the tray for about an hour or so, then empty the excess water and return the tray to its spot in the sun.  As you can see, the greens are coming along nicely – some are over 2” high. If they keep this up, by the end of 10-14 days I can start harvesting by cutting the greens for salad.  The neat thing about micro-greens is that they pack all the nutrients of the full plant in just the small sprout package!
 

Microgreens-2Bwk-2B1

Adventure in Microgreens!

As I search for ways to teach how to grow food in winter (and/or indoors), I happened on a slim volume called “MicroGreenGarden: Indoor grower’s guide to gourmet greens,” by Mark Mathew Braunstein (Book Publishing Company – Green Press Initiative, 2013).  Braunstein carefully and clearly sets out the advantage of microgreens and how to start and grow them.  I was inspired!

Seed-2Btray
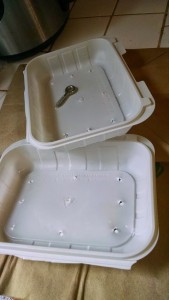
On Friday (11/21) I scavenged a couple of take-out boxes from Olive Garden that my son brought home (filled with food).  They are good plastic (recyclable) and sturdy.  Following Braunstein’s directions, I cut the top and bottom apart.  The top became a stabilizing addition when added underneath the bottom part.  Since I didn’t have an ice pick (which he recommended using), I found a large eye-screw and made 9 drainage holes in the bottoms of the stacked tray. 
seed-2Btray-2Bliner
 
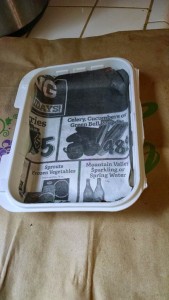
Then I found some newspaper (he recommends sturdier paper, but I hated to use good copy paper) to put in the bottom of the tray so that the starting medium doesn’t clog the drain holes. Next step in the process was to mix starting medium/potting mix with water to make it mushy and put it into the tray.
 
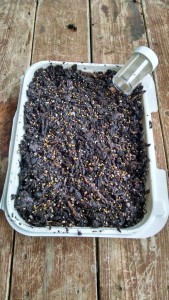
I found some seeds for sprouting languishing in my refrigerator (an organic mix of alfalfa, radish and broccoli) and measured out 1 tsp. of the seeds (per his formula on page 40).  I used a small camping salt/pepper shaker to sow the seeds evenly across the top of the wet potting mix in the tray.  That’s a lot of seeds for the tray – I probably only used ¾ tsp. and threw the rest into one of my garden containers among the greens that are growing nicely.  Then I pressed the seeds into the mix (not covering them!) with my fingers to make contact with the moist soil.
 

Seeds-2Bplanted
I found a larger container without holes in which to put the planted tray. Braunstein recommends covering the seeded tray with a wet cloth or paper towel until the seeds sprout. I put the tray in my upstairs study by a west-facing window (it gets somewhat warm from sun during the day) and covered with a wet paper towel.
An alternative would be to leave the trays uncovered but mist or spray them three times a day.  Well, I wouldn’t be able to do that, so I opted for the paper cover.
From here, I bottom water about once a day (for my smaller, ½ pint container – every other day for a pint container), or when the top of the soil feels dry.  Now to watch for the sprouts.
I’ll keep you posted on my progress!