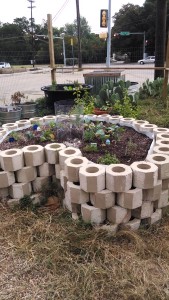
Container Hugelkultur – its possible!

A few weeks ago I was asked to assist build-out of a garden in 10 horse troughs – the 8′ long, 3′ wide and 3′ deep galvanized type.  Here’s how we did it on the low budget side with maximum soil building and micro-organism habitat that is high in organic matter…. with hugelkultur!

First, we drilled holes along the bottom of all sides – 1/2″ holes about 12-18″ apart about 2″ up from the bottom.  This is for drainage.  Otherwise, we’d have a bathtub marsh and vegetables and herbs just don’t grow well in marshes.

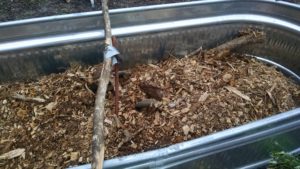
The containers had water lines already set and coming in from the bottom.  These had to be held upright so that we could connect drip irrigation at the top when the containers were filled.  We duct-taped the lines to a stick used as a cross piece.

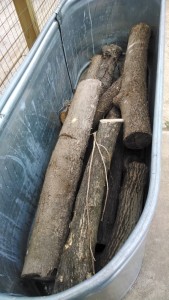
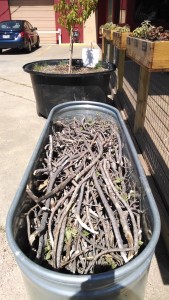
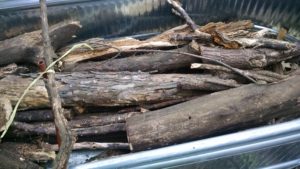
Next, we added logs and branches, cut to about 3′ lengths.  This filled in the bottom foot or so.  The wood was collected from an urban forest – it was downed wood, that was older – the best!  The wood will decompose, forming a wonderful habitat for micro-organisms, while also becoming spongy and thus holding water.
Then we needed to fill in the spaces between the logs – what better material than wood chips?!

We were generous with the wood chips, and then put in lots of leaves, which were watered in well.
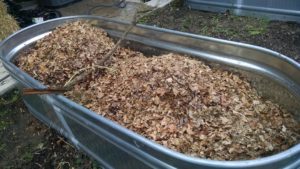
We knew the containers were draining well when we watered in the leaves – all the leaves needed to be moistened, just like in a compost pile – because water drained out the bottom of the containers into the walkways.  These became a bit muddy, so we added woodchips to soak up the moisture.

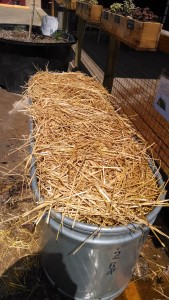
Our next step was to add more woodchips.  We watered again.  We added straw.

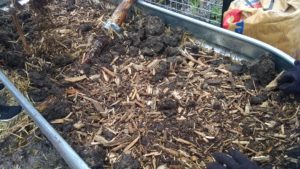
We noticed that a bobcat was leveling a site across the way from us, and the dirt it was removing didn’t look like black clay.  We went over to investigate, and the soil was mixed with woodchips – that had been put down on the site a year or so before.  We convinced the bobcat operator to share some of this woodchip loaded soil with us.  And we added it to the mix – it helped us innoculate the beds with native micro-organisms.

You can see that we are filling up the bins nicely.  Once again, we watered the bins to help compact the straw.  We had been working about an hour and a half (it went quickly with about 10 people working), and took a break while we waited for the top soil to arrive.

This was the only expense – 10 cu. yds. of organic top soil. The rest of the materials were scavenged or delivered free (ever wonder what tree trimming services do with the limbs they chip –  often they have to pay to dump them so they are very happy to provide free chips to folks in their area), or leaves nicely bagged and left at the curb for picking up by anyone.

The top soil then was used to top up all the bins.  Doesn’t this look luscious and ready to plant?  But wait!  We need to add a couple of things to help these garden beds along – my favorite trio of Azomite (pelletized volcanic ash that provides essential and trace minerals to the soil), Wildroot mycorrhizal fungi to help the plant roots access nutrients in the soil, and worm castings (one of the best sources of bacteria for the soil ecology as well as fertilizer).
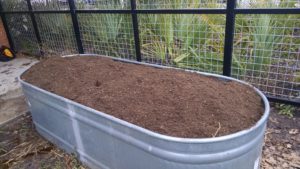
All that is needed is to set the top drip irrigation lines, and plant!

These beds will not need as much water as other raised beds because of the hugelkultur construction.  They will sink down as the organic matter decomposes – just like a compost pile – but then all one needs to do is add mulch and/or compost on top with every planting season.


My First Tomato Worm – Ever! and Hugel Kultur Bed 3 Years On

tomato worm wasps

I was examining the tomato vines that seem to be everywhere, and found … my very first tomato worm … EVER!  I’ve always planted marigolds and basil with my tomatoes, but this year those plants got overrun with the tomato vines.  I was concerned at first, but then noticed that the worm was covered with wasp larvae.  They will take care of the worm.  Nature taking its course.


At the Dig Deep growers conference in Fort Worth this past weekend, I re-established contact with the organizers of the Community Harvest garden in Plano.  I visited on Sunday, and took a tour.  Of note was a hugel kultur bed that is about 3 years old, and going strong. My tour guide mentioned that the bed was placed flat on the ground, and that next time they would dig a trench in which to place the wood branches that form the base component of the bed.

hugel cuuc 3 yr

Golden Harvest Time, And Greens Go Wild

Leaves
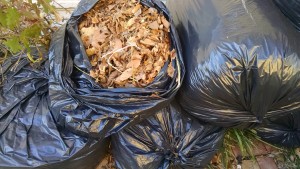
Leaves – they are appearing by the bagful on curbs all over the city. And I’ve been driving about, collecting as many as I can. I particularly like the large clear bags of leaves so that I can be sure it’s just leaves, and not trash.

Leaves are gardener’s gold. They provide carbon for the compost pile. They are a good soil amendment and are great for mulch. I use them prolifically in my hugelkultur beds.

And most important – They are free.

So save your leaves and put them on your garden beds or work into your compost pile now and gather a few extra bags for use later in the year.

Garden greens more dec 2015

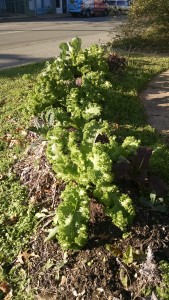
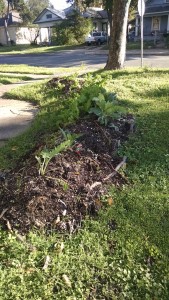
Remember that hugelkultur bed I installed a month or so ago? The greens are taking over! We had our first dish of greens – collards and mustard – from the garden last week. And I go through and remove ragged leaves for the hens – which they, of course, love. The greens have weathered our almost-freezes well, and the chard is beginning to take off.

Now, we’re going to be installing a spiral garden in another part of the yard, and more growing space. Stay tuned for updates!

Greenhouse Installed! Hugelkultur Bed Greens Are Thriving

As the weather turns colder, we are getting serious about growing food for the winter. Yes, we can grow year-round in the DFW area.

Hugel greens

The hugelkultur bed out front is covered with greens – mostly mustard and collards, with some chard. The mustard is taking over and is now soaking up the wonderful light drizzle.

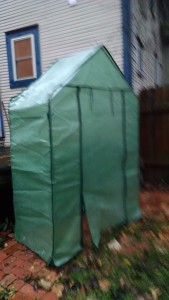
Meanwhile, the greenhouse has been reassembled and tied to the deck out back.  It will allow us to start seeds for herbs for the spring, as well as cultivate Malabar spinach from cuttings we obtained a month or so ago (the porch kitties keep trying to eat our attempts to start it on the front porch!).

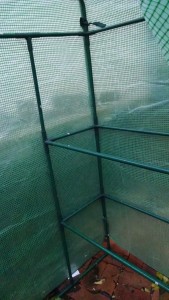
The peek inside shows supports where I’ll be installing the shelves.  The greenhouse itself is pretty roomy, with room for up to 4 flats of seedlings on the shelves and another couple on the ground underneath.  I can even walk in!  It’s about 36″ deep (I know, because I assembled it indoors and it barely fit through the 36″ doorways on the way out to the backyard!)

Greenhouse compact

The greenhouse (a Gardman) is a kit that I bought a couple of years ago, then stacked and stored sometime last year.  It is compact, and stores in a minimal space when not in use.  It is remarkable for a kit – in February 2014 when it was freezing outside, I unzipped the door and walked into a warm, humid environment.  Not exactly 60 or so degrees, mind you, but certainly very much above freezing and seedlings were thriving.

Greenhouse inside

One caution on greenhouses – when it rains, the plants do not get water!  Now that might seem intuitive, but I speak from experience – I keep a watering can inside the greenhouse for dowsing seedlings.

Compost and Hugelkultur

We’ve been busy here at the urban homestead….

compost now

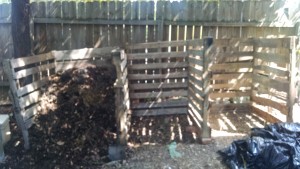
First, we salvaged several pallets to start a measured compost pile.  Now, there are many ways of composting – from piling some vegetable matter in a heap and walking away … for as much as a year. After all everything composts eventually. All the way to the 18-day Berkeley method that requires careful building and turning religiously throughout the 18-day period.

I chose to go with a medium-time way.  Pallet-walled bins that allow turning on an occasional basis.  We’ll have compost within a month or so.  In fact, much of the vegetable matter that went into the bin were composting of themselves in the plastic bags!  With the chicken-coop litter, nitrogen was incorporated to help heat the pile up.  Made sure it was damp and then covered it with a tarp.

compost site bins

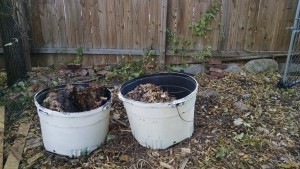
It was great to have the bins made…I’d been using old tree-planters and before that a little galvanized can.  The bin method will suit me, because I’ve been expanding my planting areas in the front yard and will need a bunch of compost to complete it.

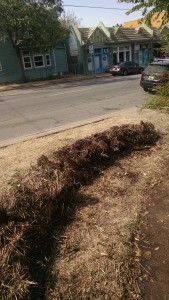
We cleared the backyard of downed and cut branches and sticks and put them on the street for the bulk pickup.  But THEN…. we decided to start another growing bed – in the ground, actually, rather than in a container (!).  So we took the pile down by half by laying out the sticks and branches to form a narrow, curving bed to follow the walkway in a portion of the front yard.

hugel sticks

Then, because my straw bales had seen better days for growing (after all, they had survived two seasons!), they went on top of the sticks, mixed in with some leaves I begged off the landscapers at my bank.

Next, we’ll put more vegetable matter on the bed, then top it all off with mulch and plant.

Hugel straw layer

This type of bed is called “hugelkultur” which is a technique that has been used in Eastern Europe for centuries.  (See my earlier postings on hugelkultur – they are more detailed.)  BUT….the essential thing about this technique is that it retains water.  That’s what we need in dry times, like we’re having now.  As the wood on the bottom decomposes, not only does it serve as a habitat for fungi, particularly mycorrhizal fungi (which are so important for the soil food web), but the wood becomes like a sponge and holds water.

Remember this – if nothing else – the more organic matter we can put into the soil, the more water it will hold when it rains, and the less you will have to water your plants!

Gardening During Drought – Part 2

In Part 1 we covered ways in which you can use compost and mulch in an existing garden bed to reduce water usage.

Now we will tackle a way to set up the garden bed to reduce water needs from the get-go!

hugelkultur bed

I’ve talked about the method before – it’s called Hugelkultur, and it hails from Eastern Europe.  Hugelkultur has been used for centuries, but it’s only become more popular after the publishing of  Sepp Holzer’s Permaculture.

Hugelkultur works to conserve in two ways:  Not only does the technique use all those trimmings from yard waste that go to the landfill, but the whole bed acts as a water sponge.

That certainly works well with water restrictions in North Texas communities and reduces water bills. I’m going to repeat what I have written before – a 100 sq. ft. bed planted in vegetables is expected to need 60 gallons of water weekly – at least.

I would love to see hugelkultur used in setting up school gardens.  The reason is that school gardens are often promised water from the district for only the first year – after that, the garden manager has to devise other ways of providing water – usually rain capture. But reducing water needs is critical, whether the district pays the bill or rain is borrowed.

Basically, hugelkultur copies what we find in a forest floor – dead and rotting trees, covered with limbs that fall, then by leaves which decompose and we have a soft, cushiony bed in which all sorts of life thrives.

Here’s what happens:  the logs (old or new) rot and become porous. They serve as excellent habitat for mycorrhizal  fungi, which are essentially for healthy plants.  AND, as the wood rots, it acts as a sponge for water.


The end result is that hugelkultur beds don’t need to be watered nearly as often.  I talked to a community garden manager last year, asking about the experimental bed she had put in.  She stated that in October they had built the bed, planted broccoli, cauliflower and cabbage and – when I talked with her in February – they had still not watered since the bed was planted!

Hugel container logs

Traditionally, the hugelkultur process starts with a trench in which logs are placed, then twigs, then leaves, then compost and soil on top.  It can be anywhere from a foot high to several feet. It all depends on where you live, what you want to put into it, and how high you want it to go. You can even install a hugelkultur bed for ornamentals that your HOA will approve of – just start with a trench and only go as high as 12” for the mound.  Many front yard plantings go that high with mulch on top.

Hugel container sticks

The bed doesn’t have to be in-ground either.  Hugelkultur can be built on the ground, or in a container.

Hugel container straw

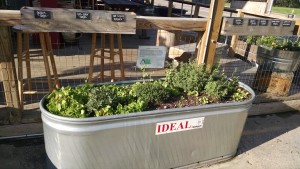
One garden I built was in a horse trough – I drilled ½” drainage holes about 8” apart on the sides of the trough. Then filled with logs, sticks, and straw, and covered with a layer of compost and planted herbs.

Hugel planted

I read online about a lady who takes muck tubs (they are the large plastic tubs with plastic rope handles often seen in barns for hauling…muck…), puts holes in the bottom and puts a short log upright in the tub.  She then drills holes in the upper end of the log (to encourage water to go into the log), fills with leaves and compost and tops with soil.  Then she plants.  She says at the end of the season, after having reduced the water needs in her muck tub containers, her plants have grown their roots around the log.  I’m going to have to try this I think this winter!

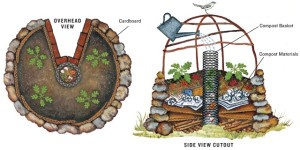
We adapted hugelkultur last month, when we built a formal keyhole garden. The home owner had trimmed crape myrtles and was about to put them out on the street for pick up.  We put those trimmings in the bottom of the keyhole garden, along with leaves, cardboard, dryer lint, straw, compost and then top soil and mulch. The garden will be a compost pile with hugelkultur overtones…a mixing of two incredible water-holding, nutrient-rich planting environments.

One caveat – the garden bed will decrease in height over time, so just keep adding mulch and compost on top. And you’ll have the richest, softest, best water-holding beds imaginable.

Be creative.  Use the concept and let me know how you have used this technique that mimicks the forest floor.

Building a New Way….in Community Gardens

I was musing yesterday as I was visiting a budding community garden. Most follow the model of outlining beds using timber and then filling in with soil. Sometimes there is a compost pile and compost and mulch are applied sparingly. What if there is another model that is yet to be implemented which is water-wise and drought tolerant? Much like the beds I saw (and posted a picture of them) in the southern Dallas county garden – outlined with logs from the property, filled with mulch several inches deep and with ollas for watering. What if hugelkultur beds became the norm – like a community garden in Plano is working toward? Or keyhole gardens? or other techniques borrowed from drought-stricken areas around the world? If we are to continue to install gardens for the community – and promote and practice farming in the city – then we need to think outside the box as water restrictions become the norm rather than the unusual.

hugelkultur bed

Hugelkultur comes from Eastern Europe, and mimics the forest floor – with wood then twigs then leaves then grasses, all of which compost and then dirt on top.  As the wood deteriorates, it creates a rich environment for the micro-organisms and fungi that are necessary for drawing nutrients from the soil and making them available to plants.  Also, as the wood deteriorates it becomes spongy and holds water.  The net result is that a hugelkultur bed, once established, needs much less watering than a traditional garden bed.  A great reference from a pioneer in the refinement of this technique is “Sepp Holzer’s Permaculture: A Practical Guide to Small-Scale, Integrative Farming and Gardening.”


The keyhole garden technique was developed by nonprofits working in dry-land Africa. The goal was to create a garden bed that would grow the maximum amount of food crops for families with a minimum of water. It is essentially a compost pile within a wall.  Once the bed is established, the central wire cylinder is the place that compost (kitchen scraps and other compostables) is placed, and any watering that is done is in the cylinder.  The moisture is then pulled out into the soil where the roots are as it is needed.  A structure of bent PVC pipe creates a framework to support either shade cloth, to protect plants from searing summer sun, or poly to extend the growing season from early spring to late fall and possibly through the winter here in North Texas.  Dr. Deb Tolman, from whom I learned the technique, says that you start with a dumpster load of cardboard that goes into the garden, along with piles and piles of leaves, newspaper, food scraps, manure, old cotton t-shirts, straw, grass clippings, and anything else that is compost-pile fodder.  These are carefully moistened as they are stomped down and compressed before additional layers are added.  Then the whole thing is topped by compost and top-soil.  And planted.  Building a keyhole can be a group party – with a large group, once the wall is built, it only takes about 2 hours from start to planting!

One important advantage of a keyhole garden is that it is perfect for someone who cannot bend over to weed or plant, yet wants to continue to garden.  It’s a raised bed extraordinaire!

Contact me if you want a hugelkultur bed or a keyhole garden to be part of your gardening experience this year!