How to Move a Garden

This past month has been occupied with moving a 750 sq ft garden from a site that is being converted to an access road. Although a permanent location is not solidified, nor is the design, the temporary arrangement is …. crates! About 110 sq ft of crates!
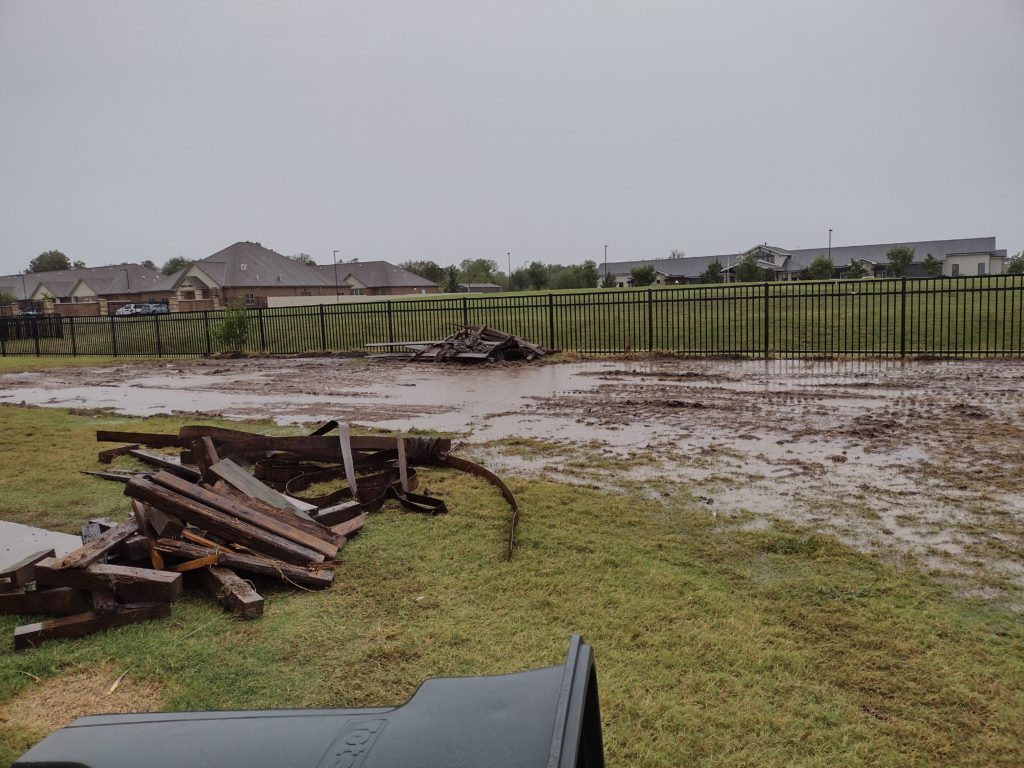
This was our garden … RIP

Milk crates (12″ cubes) are being used for the primary (new) crops, while vegetable crates (22″x14″x9″) are housing the asparagus crowns and the strawberries. Liners for the crates vary: the vegetable crates holding asparagus are lined with burlap bags, donated by a local coffee roaster. Since the burlap will deteriorate over time, when the asparagus needs to be transferred to its permanent bed, we can just lift the burlap and crowns as a whole and place in the bed, with minimum disturbance. When we moved the asparagus we carefully dug as far under the crowns as possible to minimize disturbing the roots. After a rain, they crowns have produced another crop of fronds. This is a good sign.

The strawberry crates are lined with net bags that housed onions for transport. Again, the strawberries were lifted with as much native soil as possible so that there was little shock. They have now been thinned and are mulched for the winter.

The milk crates are lined with weed barrier, to allow for drainage, but not allowing the soil to leak out. They are filled with soil from the garden and seeded with kale, spinach, carrots, turnips, arugula, and chicory greens. Take a look at the kale and spinach, thriving in the fall weather in its new home!
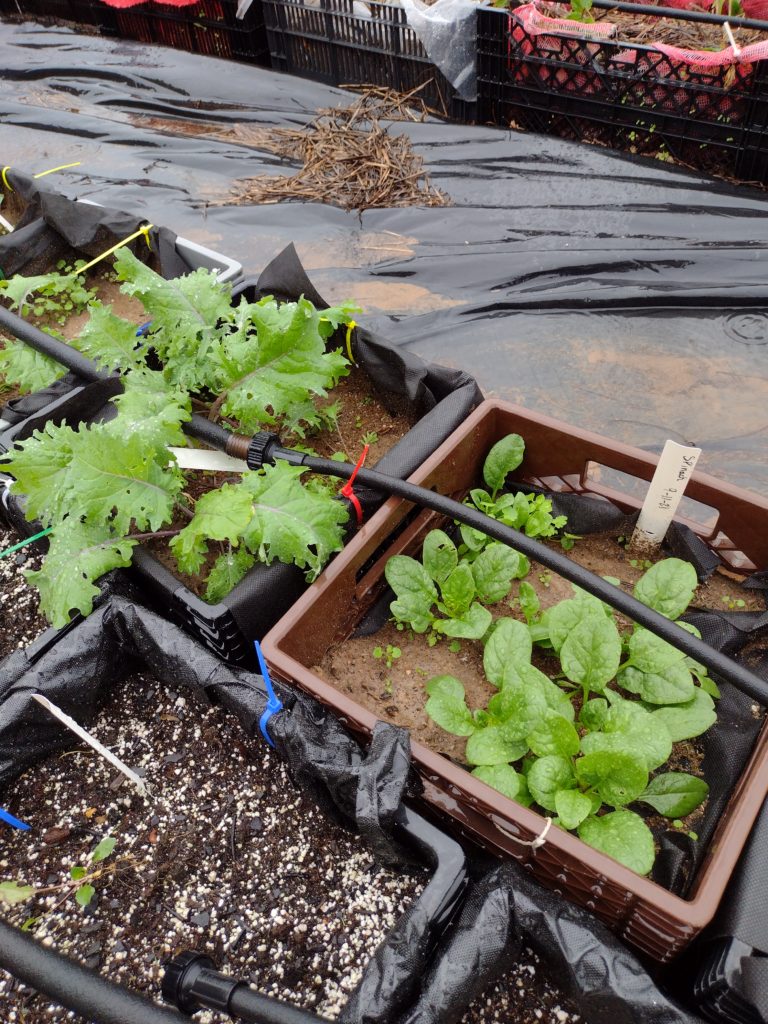
Thriving kale and spinach!

Now, as an aside, I’ll say that the milk crate garden idea comes from the Riverpark Farm NYC, which created and maintains a large farm solely in milk crates! And milk crates are so portable, that the farm has moved a couple of times since its inception. It’s a marvel.

So … here in Tulsa it can get quite cold. There is a plan. There are two methods that we used in the old garden beds:  mulching heavily and using row cover. The new, temporary, garden will receive those two treatments.

The asparagus already has been given a mulch of straw.  The mulch will insulate from temperature extremes, and will help the soil hold moisture when it rains (or we water).  When the spears turn yellow, we will cut them to about 1-2” and then mulch with about 3” of straw.  This should carry them through freezes.

 The strawberries are getting some light mulching, but as the freezes start we will be adding straw.  In February of this year, when the Great Freeze happened, we completely covered the plants with straw.  When the weather began to warm again, we pulled it aside and the little green leaves perked up.

As for the rest of the crates, we’ll be creating a microclimate.  That means modifying the environment around the crates to lessen the impact of extreme weather.  In the next few weeks, bales of straw will be placed on the north side of the milk crates.  The straw will protect the crates from north winds.  Then the crates will also be sporting hoops to support row cover.  The row cover will also lessen the impact of weather extremes.  And, if it snows or ices, the snow/ice will settle on the row cover and become insulation! 
Keyhole Garden Build

Keyhole Garden partially filled

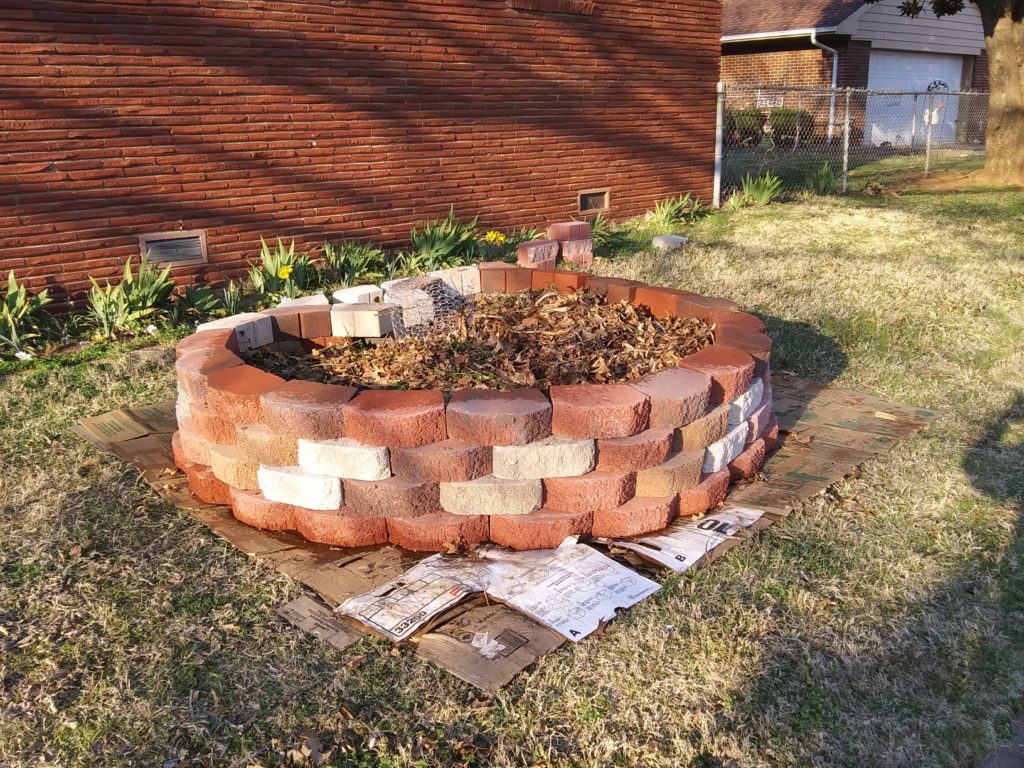
This week’s project was a keyhole garden. It is modeled after a design created several years ago by a nonprofit organization, Send a Cow, to help families in arid regions of Africa. The design is basically a raised bed with a compost pile in the middle. It holds water because of all the organic matter with which it is filled, and allows greater density of planting because of the richness of the soil.

I learned how to make raised bed keyhole gardens when I attended a workshop taught by Dr. Deb Tolman, an environmental scientist, and a strong advocate for this type of bed.

First, I accumulated 92 landscape blocks, the ones used to build retaining walls. They are more attractive than concrete blocks that can be used. However, this bed will be out in front of my house, so I want it to be attractive. Otherwise, concrete blocks can be painted for aesthetic purposes.

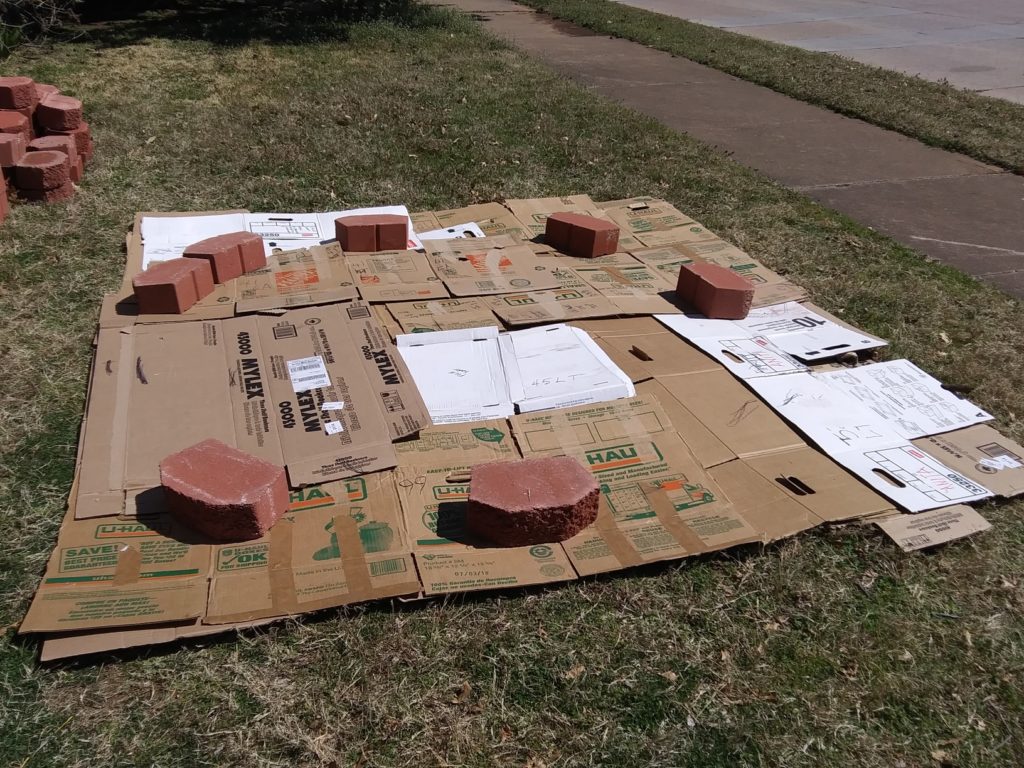
I had plenty of cardboard from boxes I’d used in moving. I removed tape, and burst them into single sheets. I then laid them in a roughly 8′ x 8′ square, with cardboard overlapping by 6″ and then doubled that thickness with another layer of cardboard. On the cardboard, I marked out a 6′ diameter circle, and started placing blocks around on the marks.

Cardboard laid, circle marked, and setting out blocks

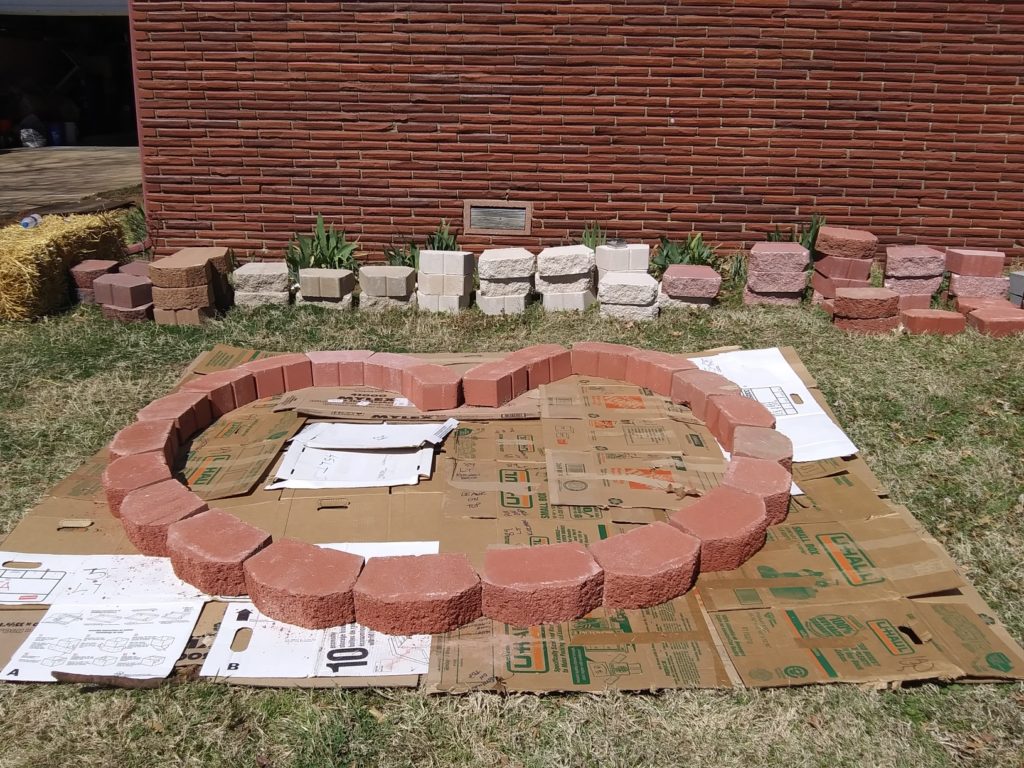
I adjusted the blocks around the circle, and aligned the “v” that makes it a keyhole.

First, base round laid out

It is critical to layout the first round carefully, because all subsequent rounds are based on the base round. The second round is placed off-center block by block of the first round. The picture at the top of this blog post is the finished wall. Note that a cylinder of wire (chicken wire or hardware cloth) with a diameter of approximately 18″ is placed upright at the apex of the “V”. This wire cylinder is to contain compostable materials on an ongoing basis.

Watering is done through the cylinder once the garden is filled and planted. In this way, the water goes through the compost and out to the plant roots. The dimensions of the garden (maximum 6′ in diameter) is the maximum distance that the water will migrate out to the plants. Note also that the cylinder is at the center of the circle.

The garden is now being filled by (1) branches and cuttings from bushes on the property; (2) leaves collected from curbs in the neighborhood; (3) wood chips; (4) turf removed when I planted trees; (5) vegetable matter that my neighbor removed when cleaning out her flower beds; and (6) some compost. I will continue to fill the bed, letting rain pack down the contents, adding some dog hair from my folks’ dog brushings, more compost, more leaves, straw, wood chips, and finally a layer of compost and top soil to bring it ready to plant – projected around May 1.

Stay tuned for progress reports!

Beginning Gardening Series – Water Part I

A plant needs sun, soil, water, and air.  We’ve covered sun in the last installment.  Now let’s talk about water.

Water is a precious resource.  Below is a graph courtesy of the Department of the Interior, Geological Survey.  If you’ll note the last two lines, only .31% of fresh water is ground water less than 1/2 mile deep.  That’s all the water we are working with !

There are two sources of water for your garden – the tap and rainwater.

Tap Water

Water piped to your property by the city or municipality is the main source of water for home and community gardeners.  There is some concern about the chlorine in tap water, because chlorine can be toxic and kill off some of the micro-organisms in the soil.  Plants do grow better and soil is healthier with fresh rainwater.  Although you can have a thriving backyard or community garden watered by tap water, if this is an issue that concerns you greatly, there are filters that can be installed on the tap or on the garden hose to filter out chlorine. RV stores carry them, as well as major retailers.  They vary in cost from $37 to $100.  It depends on your budget.  A good brand appears to be Gard’n Grow that is made for attaching to a garden hose. An internet search can give you a variety of choices.

Rainwater

Rain is the best water source for your garden.  Capturing rainwater from roofs entails use of gutters, downspouts, and rain barrels or cisterns.  Depending on what you have available already (e.g., gutters and downspouts), installation of rain collection can be budget-friendly or expensive.  There are adapter kits available at the hardware store to divert rainwater from existing downspouts, into food grade (NOTE:  must be food grade) barrels which can be obtained online or through municipal water collections classes.  A rule of thumb is that a one-inch rain will deliver .6 gallons (that’s 6/10ths)/square foot of roof to your collection point.  So, a 2000 sq. ft. roof would be expected to give you 1200 gallons of runoff in a one-inch rain event.  A 50-gallon drum would be overflowing in a heartbeat.  So plan storage accordingly.  When I attended a class at Texas A&M AgriLife Extension, we were told to plan capacity to hold water equivalent to usage for 30 or more days, depending on the longest average time without rain in our area.

Another way of capturing rain, called “harvesting rain,” is through building soil with organic matter, creating rainwater diversion channels, and use of mulch.  We’ll talk about these methods of harvesting rain in the next module, which will deal with soil building.

Conservation of Water

Whichever way you plan to water your garden, conservation of water is important.  The way in which you water your garden can play a big role in the amount of water you use.

              Rows and Ditches

The old way of planting a garden has been to form raised rows, divided by ditches, through which water flows.  Although it gets water to the root of the plants, a lot of water is evaporated before the water can soak into the soil.

             Hand Watering or Sprinklers

This method is with a hose and spraying by hand.  It is time and labor intensive, and water tends to evaporate on the journey from hose end to ground.  In addition, some plants prefer to be watered at the ground level.  If you hand water, bear in mind that the best time to water is in the morning, to allow moisture on leaves to evaporate during the day.  If you water in the evening, some water stays on leaves, and on the top of the ground, and can promote disease and attract pests.

Watering with sprinklers is similar to watering by hand.  There is lots of water evaporation between sprinkler and plant/ground contact.

            Drip Irrigation

Drip irrigation delivers water at a slow rate, directly to plant roots.  This is the preferred way to water plants.  The slow rate of delivery allows water to soak in rather than puddling around the plants.  Drip irrigation kits complete with hoses and emitters can be purchased at hardware stores.  They can be as elaborate or expensive as you want.

I tend to favor a ½” porous hose, called a drip soaker, which can be purchased at hardware stores.  They last me about 2-3 years before the sun deteriorates them and I have to replace them. The soakers come in varying lengths.  I usually get a long one, with some hose coupling hardware, and then cut the hose into the lengths I need for whatever garden I’m irrigating.  I use “Y” couplings for adjacent beds, and can direct flow to one or the other or both beds at will.

What’s Ahead

In our next post, we’ll continue discussion of watering methods – highlighting the “olla.”  Stay tuned ….


Beginning Gardening Series – Design Considerations

As with any venture, it pays to plan beforehand.  Here are some considerations to take into account when planning your garden.

Sun Requirements

First to consider is sunlight.  Plants need sun.  Most plants need up to 8 hours of sunlight, some can make do with 6 and some with 4.  But you won’t be able to grow tomatoes and peppers if you don’t have at least 8 hours of sun.

Garden Accessibility

Placement of the garden is important.  Is the site easily accessible?  If it’s not, then you probably won’t be visiting it very often.  And gardens require frequent checking.  The ideal spot is close to your kitchen door, or where you will walk every day.  That way, you can eyeball the plants and see if they are thriving, if they need water, if weeds are encroaching, and what can be harvested.  Okra and squash can go from edible to gigantic and woody within a couple of days.  It pays to keep an eye on them daily.

Start Small

What sort of space is available in that sunny area?  Is it small?  Is it large?  The temptation for a large area is to turn it into a garden immediately – and then it gets away from you and grows weeds and you get discouraged.  Even if your family is excited about a garden, how excited will they be when it is hot (for a summer garden) or cold (for a fall/winter garden) and the garden needs watering, weeding, and harvesting?

Time Availability

No matter the size of the space, START SMALL AND SUCCEED.  What time do you have to devote to a garden?  A small plot, maybe two 4’x8’ beds, can be maintained in about 15 hours a day.  For a larger area, such as a 1200 sq. ft. garden, plan on devoting up to 4 hours a day.

In-ground or Containers?

Do you want to prepare an in-ground garden or go with containers?  If you rent and your landlord doesn’t want you tearing up lawn, then containers or straw bales might be the way to go. (NOTE: In the Resources section of this website is a summary of how to build a straw bale garden.)  Alternatively, if your sunny spot is on a patio or paved area, containers and/or straw bales would work well.

Physical Capability

What is your physical capability?  I’m of the age that working an in-ground garden is difficult, with all the bending required, and getting and down and then up again isn’t so easy.  I opted for containers and straw bales in my last house.  My next one, I’ll build raised beds (at least 24” high) to avoid stress on my back.

Agriscaping

Another way to garden is to tuck edibles in and amongst your ornamental plantings.  Some vegetables can be very pretty and colorful (bell peppers come in purple, yellow, red, as well as green).   This is called “agriscaping.”

Budget

And then there’s money.  How much do you want to spend on building your garden?  There are ways of digging in-ground beds and building soil that are inexpensive, and there are methods that are as expensive as you want them to be – like building raised beds with timbers, bricks, pavers, or rock.  Look to your budget.

Width of Beds

If you are planning go build the garden in-ground (or even if you build wooden boxes for raised beds), consider how wide the beds should be.  Three feet wide is an easy width for accessing even the middle of the bed from either side.  A four-foot wide bed might be a stretch.  And why is this?  Because you don’t ever, ever want to walk on the planting beds once they are set up.  Walking on the beds compacts the ground and reduces the ability of the soil to absorb water and provide ease of penetration for plant roots.  We’ll get into soil building in another module.

What’s Ahead

In the next installment, we’ll talk about water for your garden.  Stay tuned ….


Beginning Gardening Series – Why Grow My Own Food

One of the questions I am asked, is “Why should I grow my own food? I can get what I want at the grocery store, even organic produce.”

I Eat Healthier

There are several reasons that I have always grown some of my own food.  One of them is that it promotes healthy eating.  I am much more likely to eat a variety of vegetables if I have just picked them from my own garden.  Sometimes I decide what to cook for dinner depending upon what is ready for picking.  I also find that the vegetables that come from my garden taste better. This is because they are picked just at their prime.  Vegetables at the grocery store, even organic vegetables, are harvested one or more days (sometimes weeks) before they are offered for sale.  Because they have to travel varying distances from the farmer to you.

Good for the Planet

And that brings me to another reason for growing my own:  food from my garden doesn’t travel so far.  Think of the use of fuel to transport vegetables and fruits from South America, or even across the U.S. There is no use of fuel to transport vegetables from my garden to my kitchen – just good ole steps for my fit bit to record!  I’ve heard it said that the average distance a vegetable or fruit travels is 1500 miles from farmer to plate.  That’s a lot!  In fact, it takes between 7 and 10 calories to produce and deliver 1 calorie to your plate.

Grow or Buy Local

That’s also why I urge folks to buy from local farmers what they do not grow themselves – the transportation distance is much less, and the vegetables are usually harvested within 24-48 hours of when they appear in the farmers market.

Better Nutrition

Getting back to healthy eating, a March 2008 report was released that said organic plant based foods are more nutritious and provide an average of 25% more nutrition than conventional foods at the grocery store.  This study was based on a comprehensive review of 97 published studies comparing the nutritional quality of organic vs. conventionally-raised foods, controlling for level of maturity, handling after harvest, and testing in the same form.  Further, there are more studies showing that pesticide and herbicide residues are still on the conventionally raised foods that are offered for sale at the supermarket.

Biodiversity

Home gardeners often choose to grow heirloom and heritage varieties, as opposed to conventional varieties of vegetables.  This practice preserves biodiversity of our food.  We are losing biodiversity at an astonishing rate. As agriculture has become more and more the realm of agribusiness, crops are selected for their uniformity, ability to be machine harvested, and maturing at the same time for efficient harvest.  AS a consequence, fewer and fewer varieties are being cultivated.  According to the FAO (Food and Agricultural Organization of the UN), 75% of plant genetic diversity has been lost worldwide since the 1900s.

Well-Being

And finally, I garden because I experience a feeling of independence, even by growing one or two vegetables. I also get more vegetables for my dollar when I grow my own.  And there is the feeling of well-being that comes with digging in the dirt and watching a plant grow and the eating the food it gives me.  That feeling of well-being is also why gardening is used as “dirt therapy” for veterans with PTSD, as well as in prisons (there is a marked reduction in violence), and in people who are dealing with emotional and mental issues.

In short, there are a number of reasons to garden.

What’s Ahead

And in the coming installments, we’ll talk about what you should consider when planning a garden, what to plant, how to plant, and how to harvest.  Stay tuned ….

What Can I Plant Mid- to Late-March in Dallas?

Getting the itch to really garden with the great sunny days?  Here’s a guide to what you can plant now and for the next 2-3 weeks.

It’s still not too late to seed in

collards
lettuces (look especially for the heat resistant varieties if you want to lettuce to last longer)
spinach
radishes
mustard
turnips
Swiss chard

Late March (depending on our having received our last freeze – usually mid-March), you can seed in:

Beans – all types
Corn
Cucumber
Malabar Spinach (a climber, but beautiful!)
Purslane
Cantaloupe
Water melon
Summer Squash
Winter Squash (acorn, butternut)

And you can start setting in those transplants for tomatoes!  Wait a bit on the peppers till after April 1.

Container Gardening Class!

March 10, 1 pm at Trinity Haymarket (1715 Market Center Blvd).


Containers are solutions to:  no sunlight in backyard or place for a garden; rented digs when you don’t want to dig up a landlord’s ground; mobile – you can take your garden with you!; and…. you can create a wonderful soil for just about any plant.  Few limits to what you can plant in your containers – depending on the size.

We’ll talk about how you can repurpose all sorts of containers to garden in the space you have. Subjects will cover large containers as well as small, and special considerations associated with container gardening. We’ll also cover what plants go best in containers and discuss planting mixes.

Join us for a fun and creative session!

Container Hugelkultur – its possible!

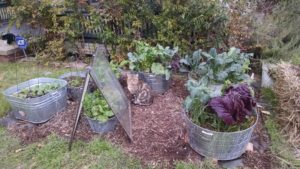
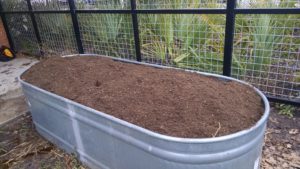
A few weeks ago I was asked to assist build-out of a garden in 10 horse troughs – the 8′ long, 3′ wide and 3′ deep galvanized type.  Here’s how we did it on the low budget side with maximum soil building and micro-organism habitat that is high in organic matter…. with hugelkultur!

First, we drilled holes along the bottom of all sides – 1/2″ holes about 12-18″ apart about 2″ up from the bottom.  This is for drainage.  Otherwise, we’d have a bathtub marsh and vegetables and herbs just don’t grow well in marshes.

The containers had water lines already set and coming in from the bottom.  These had to be held upright so that we could connect drip irrigation at the top when the containers were filled.  We duct-taped the lines to a stick used as a cross piece.

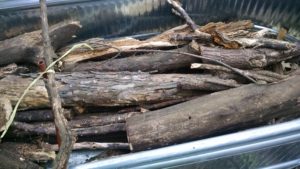
Next, we added logs and branches, cut to about 3′ lengths.  This filled in the bottom foot or so.  The wood was collected from an urban forest – it was downed wood, that was older – the best!  The wood will decompose, forming a wonderful habitat for micro-organisms, while also becoming spongy and thus holding water.

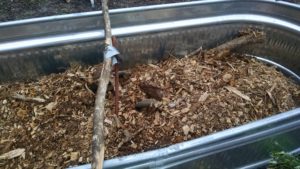
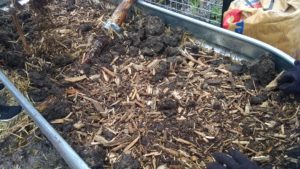
Then we needed to fill in the spaces between the logs – what better material than wood chips?!

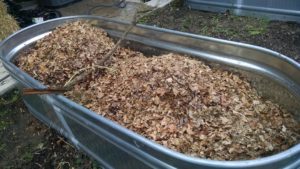
We were generous with the wood chips, and then put in lots of leaves, which were watered in well.

We knew the containers were draining well when we watered in the leaves – all the leaves needed to be moistened, just like in a compost pile – because water drained out the bottom of the containers into the walkways.  These became a bit muddy, so we added woodchips to soak up the moisture.

Our next step was to add more woodchips.  We watered again.  We added straw.

We noticed that a bobcat was leveling a site across the way from us, and the dirt it was removing didn’t look like black clay.  We went over to investigate, and the soil was mixed with woodchips – that had been put down on the site a year or so before.  We convinced the bobcat operator to share some of this woodchip loaded soil with us.  And we added it to the mix – it helped us innoculate the beds with native micro-organisms.

You can see that we are filling up the bins nicely.  Once again, we watered the bins to help compact the straw.  We had been working about an hour and a half (it went quickly with about 10 people working), and took a break while we waited for the top soil to arrive.

This was the only expense – 10 cu. yds. of organic top soil. The rest of the materials were scavenged or delivered free (ever wonder what tree trimming services do with the limbs they chip –  often they have to pay to dump them so they are very happy to provide free chips to folks in their area), or leaves nicely bagged and left at the curb for picking up by anyone.

The top soil then was used to top up all the bins.  Doesn’t this look luscious and ready to plant?  But wait!  We need to add a couple of things to help these garden beds along – my favorite trio of Azomite (pelletized volcanic ash that provides essential and trace minerals to the soil), Wildroot mycorrhizal fungi to help the plant roots access nutrients in the soil, and worm castings (one of the best sources of bacteria for the soil ecology as well as fertilizer).

All that is needed is to set the top drip irrigation lines, and plant!

These beds will not need as much water as other raised beds because of the hugelkultur construction.  They will sink down as the organic matter decomposes – just like a compost pile – but then all one needs to do is add mulch and/or compost on top with every planting season.


Update on those late plantings

If you read my last post, you will know that I am experimenting – isn’t all gardening experimenting? And that’s what makes it really fun!

About 10 days ago, I planted seeds for broccoli raab, cauliflower, and collards and placed the 4″ pots in a wicking bed.  Well, yesterday (at 9 days) I checked them.

The broccoli raab had sprouted, as had the collards.  However, the cauliflower was having difficulty.  Since the cauliflower was on another wicking raft, I moved it to the raft with its cole buddies.  Also, I was told that sometimes it is necessary to top water till fully moist before the wicking is started – sort of like priming a pump.

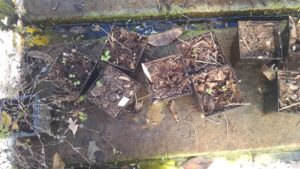
Here’s a picture of the little seedlings!  It’s another 70 degree day today and tomorrow, with temperatures dipping into the 60s in the next couple of days.  But still not close to freezing.   I’m optimistic that I can grow them to transplant size.  Although, in the wicking bed I could easily protect them, while the water reservoir maintains a more constant temperature.

Note the bits of green to the left and barely visible in the middle.

Stay tuned….

Too Late to Plant? Maybe Not…

Various planting guides stop at about November, while others continue on through the winter, recommending what plants can still be seeded.

In the past, I’ve tended to plant my carrots as late as the first of November (when the tomatoes are dying back), and reap a harvest in February and March of great carrots that grew slowly but fully during the winter.  I’ve also planted turnips in October, to have very juicy turnips for Thanksgiving.

This year, I decided to try an experiment and plant (by seed) three crops even this late – I’m writing this November 17.  The three crops are winter-hardy:  collards, cauliflower, and broccoli raab.

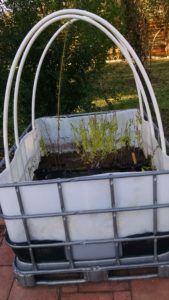
I’m fortunate enough to have a nifty bottom watering container on the property where I’m renting.  See the picture.

If you have taken a permaculture course, you may recognize this concoction.  It is an IBC tote that has had the top third cut off, PVC pipe is inserted so that a greenhouse or shadehouse can be created; the tote has water in it, upon which is floating styrofoam rafts covered with fabric (wool or cotton).  The fabric wicks the water up to the top of the rafts, on which you place your pots with seedlings.  The next picture will show what the collards and broccoli raab containers look like, all floating on their raft.

So… I took some 4″ pots left from transplanting herbs into a garden bed, filled them with rich, rich soil from the keyhole bed I’d built (a compost pile by any other name) and which we’d broken down and salvaged the soil.

Then I planted seeds and soaked the seed medium.  Then I placed on the wicking raft.  I’ll watch the plantings for the next several weeks and see if they (1) sprout; and (2) become viable transplants this late in the season.

Stay tuned…..