The Garden in Winter

“So what should we do with the garden this winter?  It seems like it wasn’t growing things as well as it has in the past.”

That’s the question I was asked this last week. 

My first response was:  if they are not growing any winter vegetables, to bury the garden in leaves – several inches thick, watered down.  Even some cardboard, well moistened.  This will help put organic matter back into the soil.  Another way to help the soil is to grow a cover crop during the winter – maybe hairy vetch – which fixes more nitrogen in the soil. 

Leaves are so plentiful this time of year.  If they do not come from your own lot, you can easily find bags carefully left on the curb – ripe for the removal by scavenging composters and gardeners like me! The last place they should be going is the landfill.  Many community gardens are lacking the carbon/brown needed for a good compost pile – leaves on the curb are an excellent source.

Compost is another treatment you could use for wintering over, layered a few inches deep on top of the soil, and then maybe spreading some azomite to add trace minerals to the garden bed. 

Azomite is said to contain as many as 70 trace minerals that are needed to grow healthy plants.  We have systematically removed these trace minerals from our soils, by growing plants with simple, commercial fertilizers.  The plants take up the trace minerals and, when the plants are removed, so are the minerals.  However if we mineralize the soil, the plants take it up, we eat the plants and our health is improved. Then, when we compost the waste and then put it on the garden, those minerals are returned to the soil.

A good garden soil will be rich and soft. So soft, you can easily grab a handful from deep down.  If it’s dry and dusty, then it is lacking in organic material.

If you are growing winter vegetables, make sure they are mulched deeply. This will not only help the plants weather cold spells, but that mulch will work its way into the soil and help improve soil fertility as well as water-holding capacity.

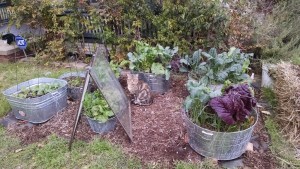
The bed pictured on the left was well mulched with straw before the cold weather hit.  It is still growing mustard and chard, and the mulch protects the feet of the plants from freezes, as well as holding in moisture – and that protects the plants from cold, drying winter winds. By spring, the straw will have started decomposing and becomes compost to feed new plantings.

And the soil….this is where it all starts!  If the soil is not healthy (read:  full of micro-organisms) then it will not produce healthy plants.  I’ll talk more about soil in another post – as well as give you a way to inexpensively do a soil census of your soil’s living organisms.


INTERPLANTING FOR TWICE THE HARVEST; UPDATE ON MICROGREENS

Interplanting is a technique that is used to obtain twice the harvest from the same space.  For instance, I will plant root vegetables (that use the growing horizon under the surface) with a leafy vegetable (that uses the growing horizon above the surface). One combination I use is carrots and mustard/chard/spinach.  Another combination I like is turnips with bok choy. 
 
Greens
I winter plant my carrots in the midst of other plants (e.g., greens) because the greens protect them (it’s called using nurse plants) until the nurse plants are harvested – usually about the time the carrots are ready to take off (in January and February). That way, I get bunches of carrots when I’m getting ready to plant the spring garden. 
Meanwhile, the greens in my outdoor garden are getting larger.  Every time I harvest some, it seems more grow to take their place.  The red mustard must be at least 15-18” high!  The lettuce is about to bolt, so it’ll go into my salads this week.  I think I’ll plant more red mustard for the color as well as the nutrients.  Of course, the kale is happy, and I see the carrots are starting to take off.
Work is continuing on the compost pile, while the microgreens grow higher – selectively. 
compost-2Bturning
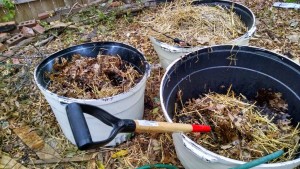
I decided to use three containers for the compost pile, especially since I had 2 containers’ worth of leaves and chicken coop straw.  With a third, I was able to turn the first pile and make sure it was moist.  Green matter from the kitchen was added and mixed in well.  I was able to use a short-handled fork – one that is commonly used to turn over garden areas.  The second container will now be turned into the first, which is now empty.  I’ll probably cover the “completed” one to let it heat up; but I’ll continue to turn it on a weekly or bi-weekly basis to make sure it’s aerated.

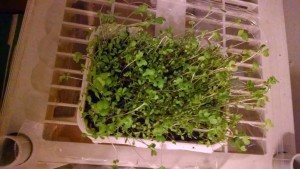
The microgreens are about ready to harvest with kitchen shears – at least SOME of them are.  I’ll have to taste them to determine which ones are the fastest growing.  I may share some of these with my chickens. In fact, I’ll probably prepare another tray of microgreens just for them.  At the rate the greens are growing, I could start a tray about every week or two and have a steady supply of tasty salad add-ons throughout the winter!

micro-2Bgrns-2Bwk-2B2

Compost – Otherwise Known as Plant Vitamins

Compost is one of the “vitamins” we offer our plants.  
Compost can be made in a large bin (e.g., 4’x4’ pallets), a wire bin, a tomato cage lined with wire mesh, a trash can (DIY compost tumbler). The important thing is to keep the mix of brown and green, keep it moist (like a sponge) and keep it turned/aerated.
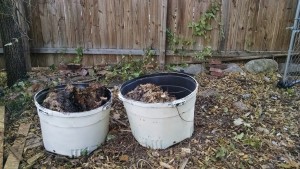
I wanted something smaller for my composting, something I could move about if needed.  Since I had a number of containers used by landscapers to transport trees, I decided to repurpose them.  They are a decent size – about 30” in diameter and about 18-20” deep.  They also have drainage holes in the bottom. 
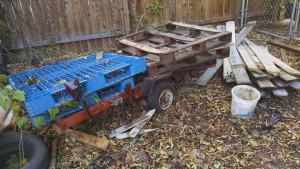
I wanted them closer to the back door than the compost pile I had 25 years ago, because the easier the access, the more likely I am to deposit food waste into it.  However….the spot was occupied by an old utility trailer covered with scavenged fence pickets.  I spent the afternoon removing nails from the pickets and stacking them elsewhere. 
Trailer
A friend helped me to move the trailer out and the bins in.
Now, the bins already contained leaves from last fall, so I had a head start on the brown for my piles.
Bins-2Bcompost
 A compost pile needs four things:  carbon materials (“brown”), nitrogen materials (“green”), air and water (50-60% moisture content).  If the pile is dry and doesn’t decompose or heat up, it has too much brown or not enough water.  The pile should be moist so that, when squeezed, a few drops of water come out. If the pile is slimy and smelly, it has too much green or wet, and needs more brown and aeration (turning). The rule of thumb is 3 parts brown to 1 part green.
I have the brown, and cleaned out the chicken coop, which gave me some nice chicken manure rich in nitrogen.  I’m also picking up some additional “green” from a friend who has too much of it.  There are also a couple of bags of coffee grounds my daughter brought over from Starbucks, so with some water for moisture I have a good start for composting!
For turning, since the bins are closed on all sides, I found a couple of grill lifters on clearance from Target.  They look like angled forks, and should work sort of like tossing a salad. 
So….what can I include as browns? Well, cardboard (shredded is best), wood ashes (but not much), dead, woody plants (chipped/shredded trees, brush), leaves, grass (brown only), sawdust, straw, dryer lint, vacuum cleaner waste, paper or wood products (e.g., shredded newspaper, magazines if not too much slick paper) and natural fibers (like 100% cotton, wool, silk).  The greens – nitrogen sources – include grass clippings, hay, fresh green leaves, manure, kitchen scraps (no meat!), coffee grounds and tea bags (make sure the filters are biodegradable.
When putting items on the compost pile, think smaller – break or shred or chop larger items so that there is more surface area for the microbes to act upon.  The bigger the pieces of material, the longer they take to break down.

When you turn your pile, break up any clumps that you find.  Turn the pile often – this keeps the pile aerated and anaerated pile heats up with the microbial activity.  And you’ll know when it’s done because it will be crumbly black and rich, and smell earthy.

And, most importantly, turning the pile  keeps the critters out!
UPDATE ON THE MICRO-GREENS
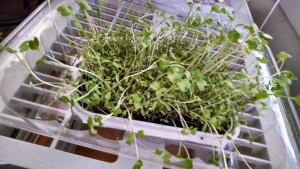
The micro-greens I talked about last week sprouted within two days! I have watered by placing the grow tray in a larger tray with water. This lets the medium and plants soak up what they need. I leave the tray for about an hour or so, then empty the excess water and return the tray to its spot in the sun.  As you can see, the greens are coming along nicely – some are over 2” high. If they keep this up, by the end of 10-14 days I can start harvesting by cutting the greens for salad.  The neat thing about micro-greens is that they pack all the nutrients of the full plant in just the small sprout package!
 

Microgreens-2Bwk-2B1

Adventure in Microgreens!

As I search for ways to teach how to grow food in winter (and/or indoors), I happened on a slim volume called “MicroGreenGarden: Indoor grower’s guide to gourmet greens,” by Mark Mathew Braunstein (Book Publishing Company – Green Press Initiative, 2013).  Braunstein carefully and clearly sets out the advantage of microgreens and how to start and grow them.  I was inspired!

Seed-2Btray
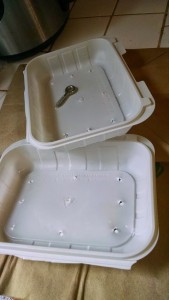
On Friday (11/21) I scavenged a couple of take-out boxes from Olive Garden that my son brought home (filled with food).  They are good plastic (recyclable) and sturdy.  Following Braunstein’s directions, I cut the top and bottom apart.  The top became a stabilizing addition when added underneath the bottom part.  Since I didn’t have an ice pick (which he recommended using), I found a large eye-screw and made 9 drainage holes in the bottoms of the stacked tray. 
seed-2Btray-2Bliner
 
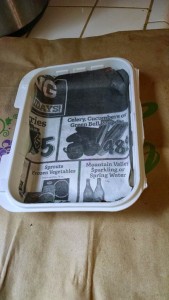
Then I found some newspaper (he recommends sturdier paper, but I hated to use good copy paper) to put in the bottom of the tray so that the starting medium doesn’t clog the drain holes. Next step in the process was to mix starting medium/potting mix with water to make it mushy and put it into the tray.
 
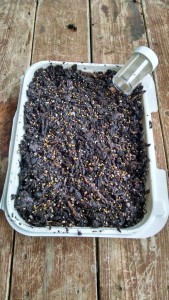
I found some seeds for sprouting languishing in my refrigerator (an organic mix of alfalfa, radish and broccoli) and measured out 1 tsp. of the seeds (per his formula on page 40).  I used a small camping salt/pepper shaker to sow the seeds evenly across the top of the wet potting mix in the tray.  That’s a lot of seeds for the tray – I probably only used ¾ tsp. and threw the rest into one of my garden containers among the greens that are growing nicely.  Then I pressed the seeds into the mix (not covering them!) with my fingers to make contact with the moist soil.
 

Seeds-2Bplanted
I found a larger container without holes in which to put the planted tray. Braunstein recommends covering the seeded tray with a wet cloth or paper towel until the seeds sprout. I put the tray in my upstairs study by a west-facing window (it gets somewhat warm from sun during the day) and covered with a wet paper towel.
An alternative would be to leave the trays uncovered but mist or spray them three times a day.  Well, I wouldn’t be able to do that, so I opted for the paper cover.
From here, I bottom water about once a day (for my smaller, ½ pint container – every other day for a pint container), or when the top of the soil feels dry.  Now to watch for the sprouts.
I’ll keep you posted on my progress!
 

SNOW!

As I write this Sunday evening, snow is drifting down…and sticking on my lawn and on my garden plants.  I have no fear that the chard will survive – it’s truly the wonder green.  I had a chard plant I kept going for two and a half years! I finally took it out, because I wanted to plant something else there.  Chard will freeze, wilt and spring back with watering.

But the mustard?  How will it fare?  I have both green and red mustard.  I’m sure the kale will make it.  Might just water it again tomorrow – deep watering – to give it some warmth.  And the lettuce under the window A-frame is missing out on the snow. 

That can be good and bad.  Snow can insulate a plant from deeper freezes.  But the ad hoc greenhouse may be just enough to keep the plants alive.  This is an experiment!

I tell anyone learning to garden – don’t be afraid to experiment!  That’s what it’s all about!  Try something new. Try a new plant. Try it in a new place or plant it in a new way.  You’ll have some failures. But you’ll also have some surprising successes – like my chard plant.

I’ll write more tomorrow – and may even take a picture or two to show how my garden did/did not survive the early snow.

Protecting Plants in the Freeze
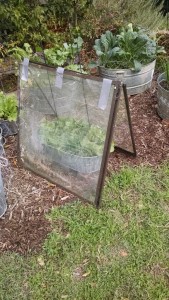
The day before the expected first freeze of the season, I watered all the plants in my container garden deeply, to keep them warm through the possible freezing night.  I was most concerned about my lettuce, which makes wonderful salads.  After brainstorming with a friend, I retrieved two panes left from an old storm door that had been sitting the back yard since forever.  With a little duct tape, I managed an a-frame greenhouse arrangement over the bed. When I checked the lettuce this morning, it was still perky and actually felt a bit warmer to the touch than the other, uncovered greens.  Of course, I expect the mustard, kale and chard to weather the freezing temperatures well.  I have had chard covered in ice which I watered and it came back.  In fact, I have had a chard plant last 2.5 years before I became tired of it in the spot and took it out!  I’ve heard of one lady who had a plant that was 5 years old.  So the lesson is, plant chard where you want it to thrive for a while and keep it watered.

Beautiful Weather for Gardening
Greens-2Bin-2Btub-2B110714
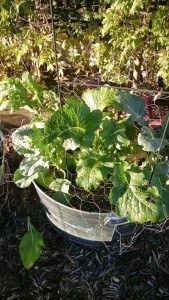
This week I worked on my own container garden, thinning the kale, mustard and chard to make room for a few plants to truly take off.  I added azomite as well as worm castings before planting. 
Azomite provides multiple trace minerals (they say as many as 70!) that have been leached from our soils over the years.  That’s one reason our food is less nutritious than it was 50 years ago. 
And it’s another reason to garden organically.  What goes into the soil, goes into the plants, and goes into our bodies.  Our bodies also need these trace minerals.  Okay, I’ll step off my soapbox now.
I did have a wonderful greens supper the night of the thinning, cooking my mustard and kale greens with olive oil and garlic.
 
Entrance-2Bpot-2B110614
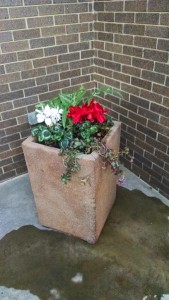
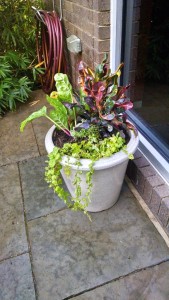
Another fun activity this week was planting a client’s ornamental pots, strewn about his pool area as well as his front entrance.  It’s a modern house with a magnificent view. 
He wanted color for the winter.  I chose cyclamens (rose, pink, red) as well as crotons (interesting veins of red, deep green, light green and gold), moneywort for ground cover and dripping from pots, cardoon (beautifully spiky for a variety of texture; this plant will grow larger), alyssum (for fragrance and some low level white contrast) and sedum (this variety has a purplish green leaf and is a ground cover that is also dripping over the edge of the pot). 
I even threw in a couple of chard plants!  Those will also grow larger, although they are hidden now.  I just can’t resist putting in an edible or two – maybe I should have also added some purple cabbage?  Well, too late now.  Since I’ve been focused on edibles, this was a fun variation.
Pool-2Bleft-2Bpot-2B110614AND THEN, I gave a talk on straw bale gardening to a local gardening group.  The advantage of straw bales is that they are mobile. They are also temporary and are ideal for renters who want to garden but don’t want to tear up a landlord’s yard.  Another use is if the only spot for a sunny garden is on the patio or the driveway! 
I found Joel Karsten’s book  (see my page on My Favorite Reference Books) on straw bale gardening particularly interesting, but decided to use an organic program to condition the bales rather than the one he uses. 
I’m on my second set of straw bales. The first ones worked really well, and by the end of the summer the tomatoes had completely covered the bales – you had to really look closely and pull tomato vines aside to see the bales.  But they required little watering and the interior was nice and composted. 
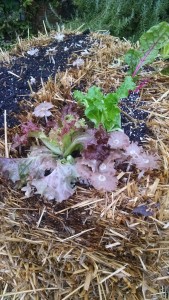
Straw-2Bbale-2Bplants-2B101014The second set I’m working on is a bit slower going because of the cooler temperatures.  I’ve used a different set of organic materials. It takes time – the plants are slow at first, but when they hit the composted interior….WOW! … they take off.  Here’s a picture of what my current set looked like on October 10.  Note the mushrooms that have appeared like stars among the transplanted greens. That means that the bales are “cooking” with microbes.

Moving Hens – and Mav the Alarmist

Chicken-2BMavAbout three weeks ago, I moved six hens into the backyard coop.  You’ve met the hens before…in previous posts… but in a different setting.  Now, they reside with me and I can sit on my back step with my tea and commune with them in the morning.  A dear friend helped me with the move, which required some planning.  First, we had to pick a night we were both available and then find two pet carriers.  A flashlight and headlamp completed the equipment list.

Hens should be moved at night – they are sleepy and so it is less traumatic for them.  We avoided lights, wondering if at any moment we might be questioned by law enforcement about why we were slinking about with flashlights hen-napping.  But, with a few squawks we managed to get all six hens transferred from their roost in the old coop and into the two carriers and loaded in my van.  A short drive to my house and the carriers were moved into position. I had planned on putting the carriers in the run and then opening the doors to let the hens wander out.  But, alas and alack … the door to the run was too narrow!

Therefore, after positioning each carrier at the door, I reached in and plucked each hen out, then placed her on the shelf above the watering/feeding station.  The shelf was the spot of choice because the coop framed out in the shed was not quite complete.  But, with a tarp over the end of the run, it was snug and cozy and the hens slept there for a few nights quite happily.

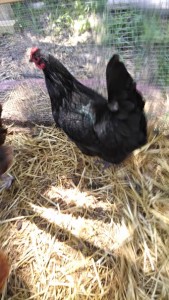
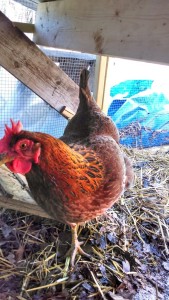
In the morning, I went out the back door, to find the hens clucking, scratching and pecking in their normal manner.  At least five of them….the sixth, Mavriki the black Australorp, was squawking and pacing about the run, checking the perimeter and otherwise fussing.  She seemed to be saying, “Doesn’t anyone else notice that this place is different?  Doesn’t anyone know we’re not where we were?!”  No one else seemed to care.  By the next morning they had convinced her it was okay, even if it was different.

The hens are now settled in and, with molting nearly complete two of the hens are laying again.  But wait eagerly for the green, blue and pink eggs to be gifted again by Winnie, Aurie and Rosie, the three Ameraucanas.


THE CHICKEN INTEGRATION SAGA OF JANUARY 2014
  

It was on the fateful day of Friday, January 17, that I finally decided the chicks could no longer stay in the indoor coop – they were just too big and I expected them to start acting out through boredom.  I’d taken them outside for a look-see earlier in the week. 
So, at the stroke of midnight, my son helped me load them into a plastic tote and take them to the hen house.  I didn’t want to wake them too much, so we didn’t turn on any lights.  I wore my camping headlamp and hoped that the local police wouldn’t find that time to drive by and we’d have to explain the intricacies of moving chickens at night!
I took each of the youth and put them in the coop.  The elder hens clucked a bit, but didn’t quite wake up.
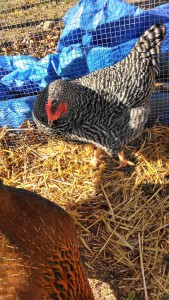
By the next morning, they were in the “basement”, the space under the coop.  Herded there by the elder hens. Later in the day, I found they were huddled at the end of the chicken run, terrorized by the elders.  I sighed and entered the run – the fully enclosed 2 foot high run – on my hands and knees and crawled toward the youth.  I wanted to herd them back into the basement where they might feel safer.  The alpha hen, Dolly the Barred Rock, took after me, squawking and flapping her wings. I brushed her back and she just settled back to cluck angrily. 
 Dolly
Then Penny, the Rhode Island Red, took her turn getting after me.  I brushed her back too. I finally gave up because the young ‘uns wouldn’t herd very well. So I crawled back and emerged from the run.
I was worried that the chicks wouldn’t be able to get any food and water, so I visited the coop after dark on Saturday with my flashlight.  The elders were in the coop settling in for the night, and the teens were out and partying – they were peeping away, eating and drinking and having a great time.  I set my mind at ease.Penny
The next morning,  Sunday, the youth were again herded to the end of the run by their elders.  Every time they tried to get to the general feed and goodies, they were intimidated back into a cluster.  One of the youth, an Araucana by the name of Aury, had a bit of blood on her beak from pecking.  So I drove to the drug store for hydrogen peroxide and swabs.  My chicken mentor, Andrea,  asked me if I’d coated the young ones with Pick-No-More, which I’d forgotten to do.  So….back into the chicken run I crawled – only this time I put some straw down so I had a cleaner crawl.  I slathered each of the chicks with the PNM, then swabbed Aury with the hydrogen peroxide and then slathered her.  Neither Penny nor Dolly tried to come for me this time….they knew I was ALPHA HEN, so all they did was cluck angrily.  Penny did take a peck at one of the chicks and discovered the awful taste of PNM, so she went off.
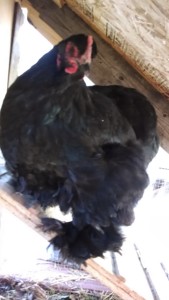
By Monday, when I found the chicks herded back into the basement, I started throwing handfuls of scratch and pellets into the understorey for them.  I also threw some greens, but C.Lo, the black cochin went after them.  So I sneaked around to the back of the coop while C.Lo was otherwise occupied and stuffed bits of greens through the hardware cloth for the chicks….they love their greens and were quite happy.
C_Lo
Tuesday, I knew the routine…give scratch and greens to the hens, then retire to the coop to replace pellets and water and then throw scratch and pellets into the basement.  Then I sneaked to the back and started stuffing greens.  By now, the chicks expected it and they were eagerly peeping….which alerted C.Lo, who came charging in to intimidate them and steal the greens.  I yelled at her, hissed, whistled and otherwise tried to scare her away.  She just stared at me.  I was stumped. C.Lo was the bully; none of the other hens seemed bothered by the chicks by now. 
I got to thinking about it.  C.Lo had been the one who was most friendly to people in her former home.  The other hens had come from large flocks and so were not so people friendly.  I realized that C.Lo would greet me when I put food and water into the coop area and cluck at me.  Then, when I went to the run to throw scratch, she’d come out too.  It hit me….C.Lo was jealous of the chicks!  And I was giving her negative attention, but attention nonetheless.
So I decided to change my tactics.  On Wednesday I threw scratch and greens in the run for the hens.  I also cut up pieces of pear.  But C.Lo wasn’t allowed by the other hens to partake of the pears – they jealously guarded them for themselves.  So I then went to the coop area with pellets and water and C.Lo followed.  I cut pieces of pear just for her and talked to her.  I cut greens just for her.  And the chicks ventured out to partake of pellets.  Every time she started to herd them back to the basement, I called to her and gave her another piece of greens. 
Thursday I continued the special C.Lo treatment, which seemed to be working rather well.  The chicks would make forays out to the run to pick up some goodie and then retreat to the basement area.  At least they were eating and drinking.  And then…..
The weather report said we’d get an arctic cold front with nighttime temperatures in the teens.  Ouch!  How were the chicks going to survive if they couldn’t get into the warm coop at night? I started by tarping the run, and re-stapling plastic sheeting around the coop and understorey to keep out drafts.  I gave the hens and chicks extra scratch that evening so they could have some fuel to keep them warm.  And I called my mentor for ideas – since I had no lamp in the coop for warmth, she suggested heating a brick in the over and then wrapping it and putting it into the coop. It would radiate enough heat to take the edge off.  So I heated a brick for about 45 minutes at 350 degrees, then wrapped it in an old sheet, and put it inside the understorey area.  And crossed my fingers.
Friday morning I was anxious.  When I approached the run and unwrapped  it for the sun to warm the chickens, only the hens were clucking.  I didn’t hear the familiar peeping of the chicks!  I spread scratch and greens and then went to the coop to put in feed and water.  The water was only partially frozen (that was a good sign!) … and out from the basement came all four of the chicks!  And C.Lo didn’t intimidate them either (although I did have special treats for her, too).
With the weather turning warm again for several days and, even though another cold front is coming through in a few days, it is not expected to get quite as cold as it was Thursday night. And the chicks now seem to have some freedom of movement and certainly can access food and water.  Maybe the Great Chicken Integration will happen after all and I’ll have a whole flock of 8 chickens. 
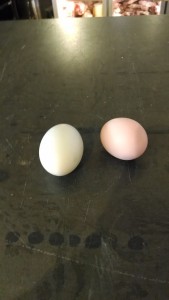
And as a bonus, I found not just the one egg (green, from the Araucana) that I’ve been finding for the past week or so, but a brown one too!  On the coldest night we’ve had, another chicken has decided to start laying.  Woohoo! 
Two-eggs