What Can I Plant Mid- to Late-March in Dallas?

Getting the itch to really garden with the great sunny days?  Here’s a guide to what you can plant now and for the next 2-3 weeks.

It’s still not too late to seed in

collards
lettuces (look especially for the heat resistant varieties if you want to lettuce to last longer)
spinach
radishes
mustard
turnips
Swiss chard

Late March (depending on our having received our last freeze – usually mid-March), you can seed in:

Beans – all types
Corn
Cucumber
Malabar Spinach (a climber, but beautiful!)
Purslane
Cantaloupe
Water melon
Summer Squash
Winter Squash (acorn, butternut)

And you can start setting in those transplants for tomatoes!  Wait a bit on the peppers till after April 1.

Container Gardening Class!

March 10, 1 pm at Trinity Haymarket (1715 Market Center Blvd).


Containers are solutions to:  no sunlight in backyard or place for a garden; rented digs when you don’t want to dig up a landlord’s ground; mobile – you can take your garden with you!; and…. you can create a wonderful soil for just about any plant.  Few limits to what you can plant in your containers – depending on the size.

We’ll talk about how you can repurpose all sorts of containers to garden in the space you have. Subjects will cover large containers as well as small, and special considerations associated with container gardening. We’ll also cover what plants go best in containers and discuss planting mixes.

Join us for a fun and creative session!

Container Hugelkultur – its possible!

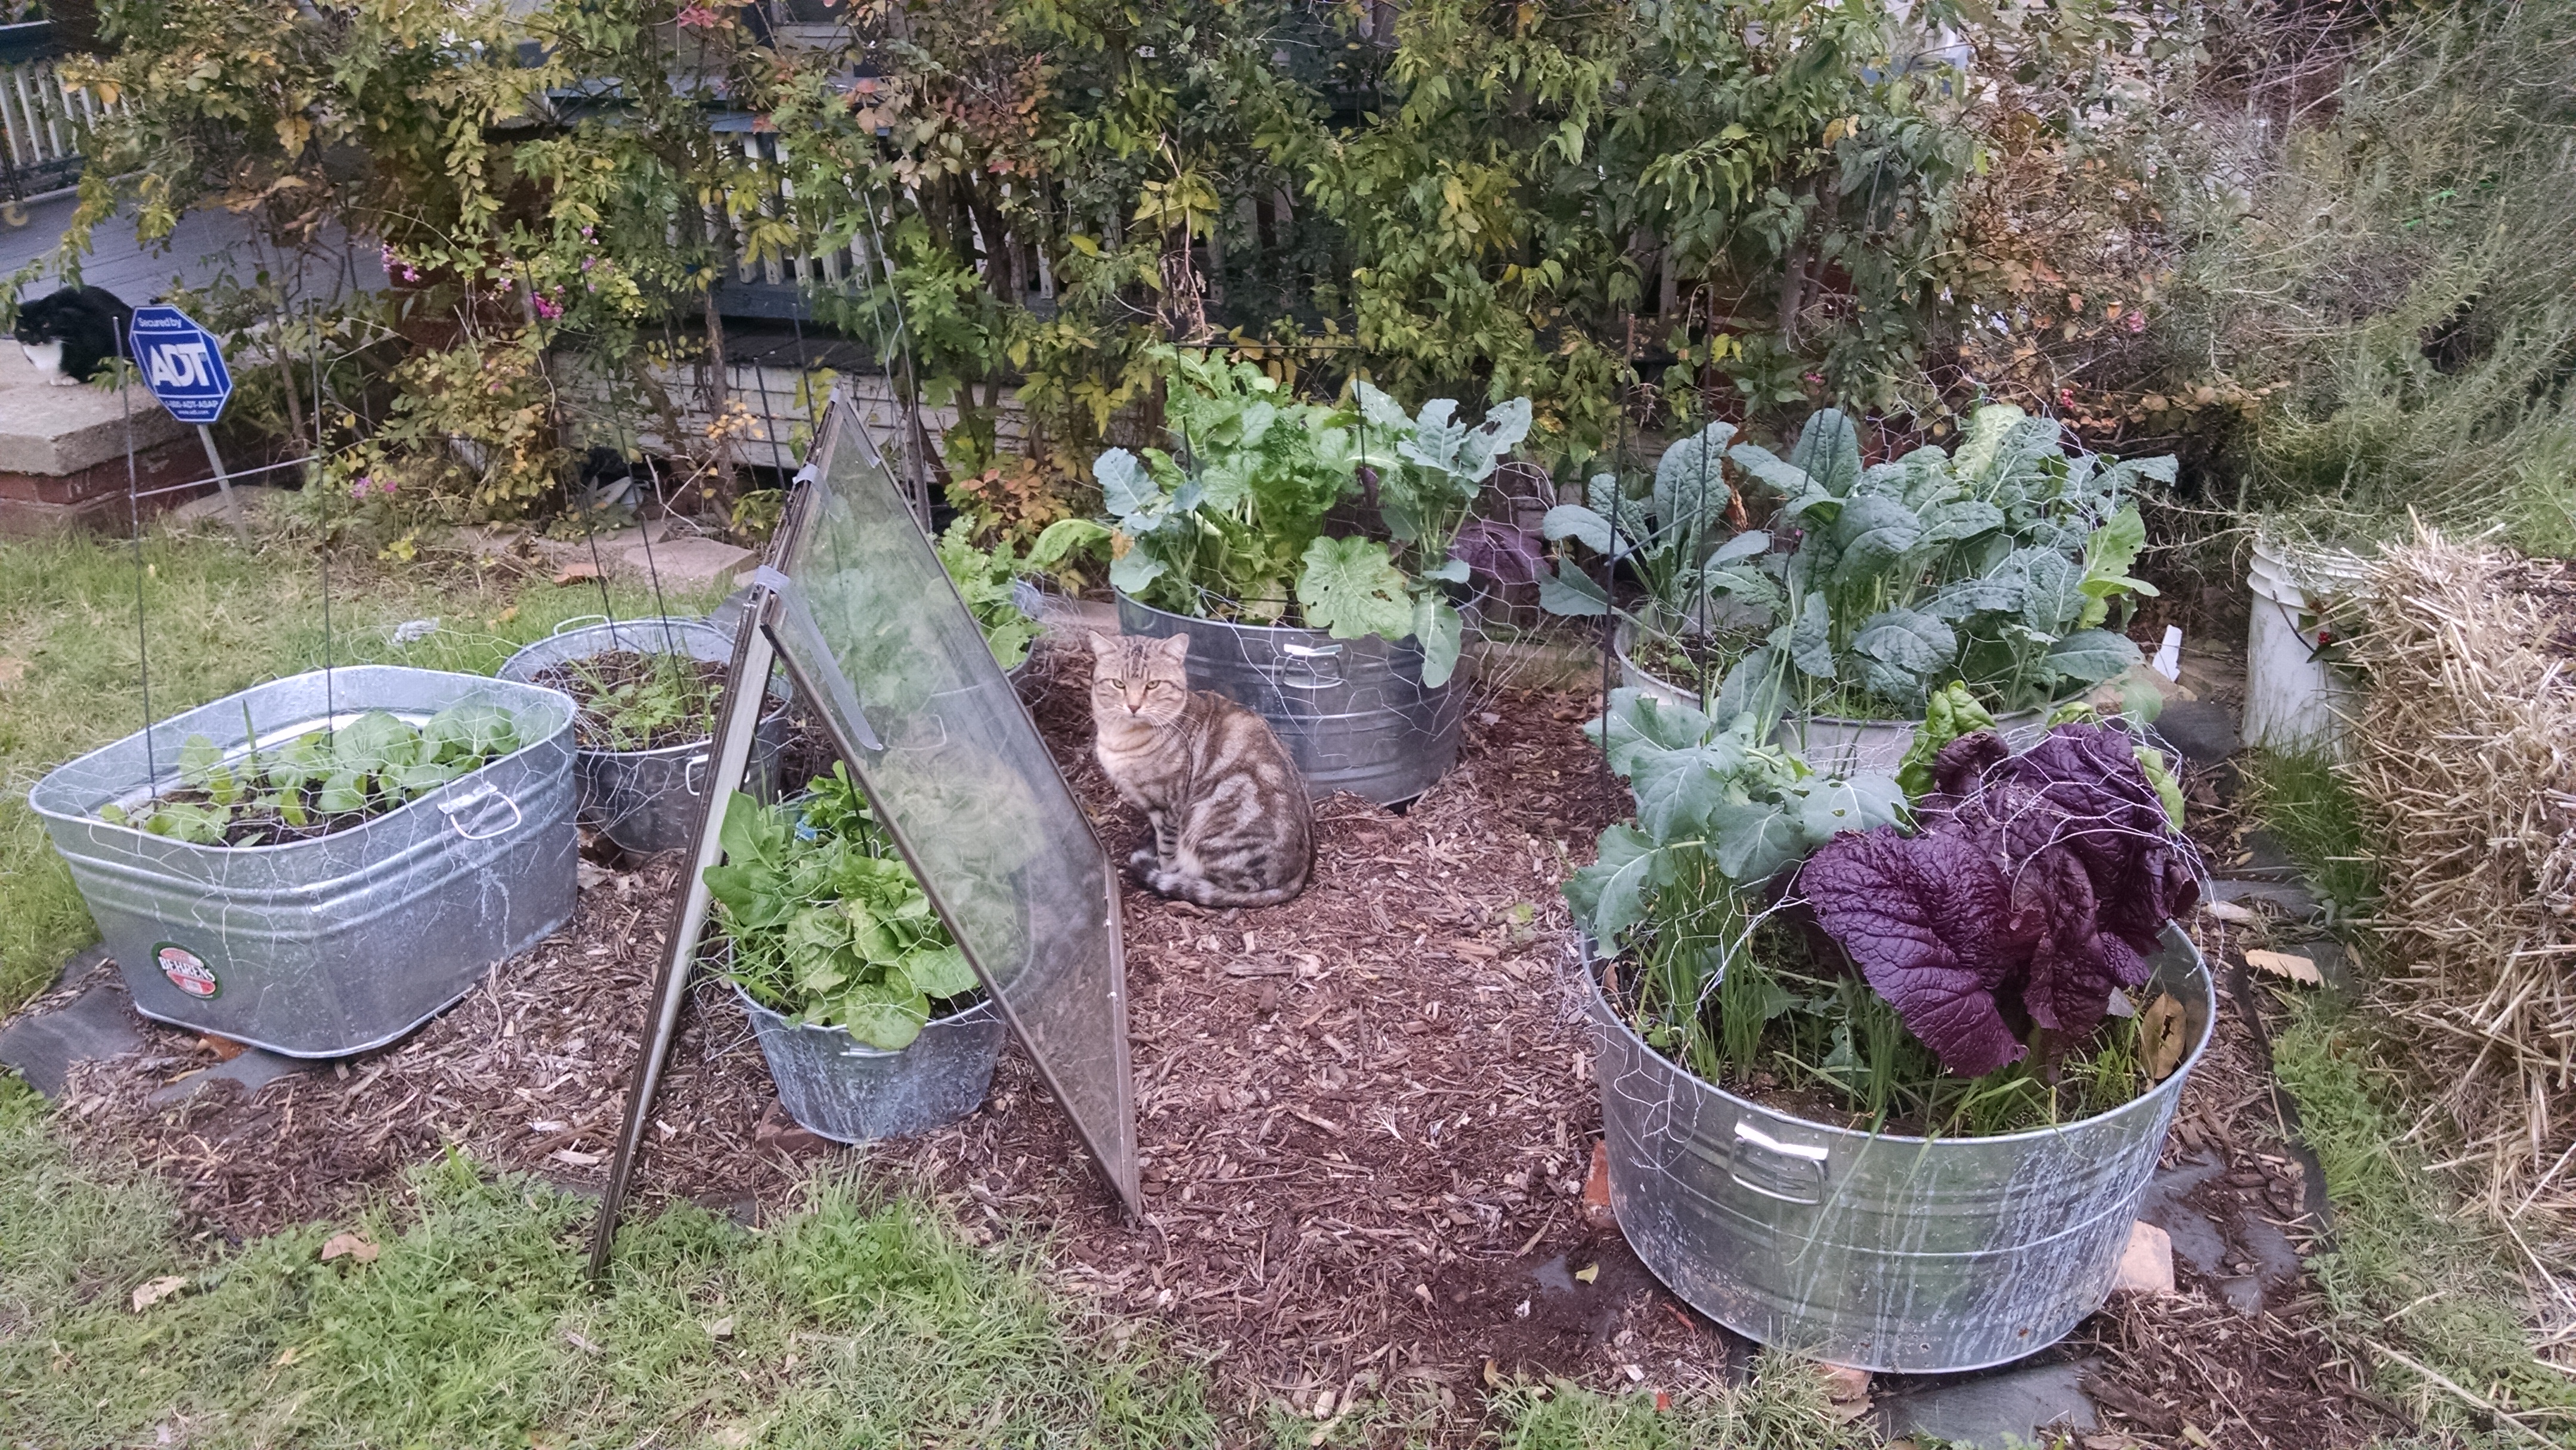
A few weeks ago I was asked to assist build-out of a garden in 10 horse troughs – the 8′ long, 3′ wide and 3′ deep galvanized type.  Here’s how we did it on the low budget side with maximum soil building and micro-organism habitat that is high in organic matter…. with hugelkultur!

First, we drilled holes along the bottom of all sides – 1/2″ holes about 12-18″ apart about 2″ up from the bottom.  This is for drainage.  Otherwise, we’d have a bathtub marsh and vegetables and herbs just don’t grow well in marshes.

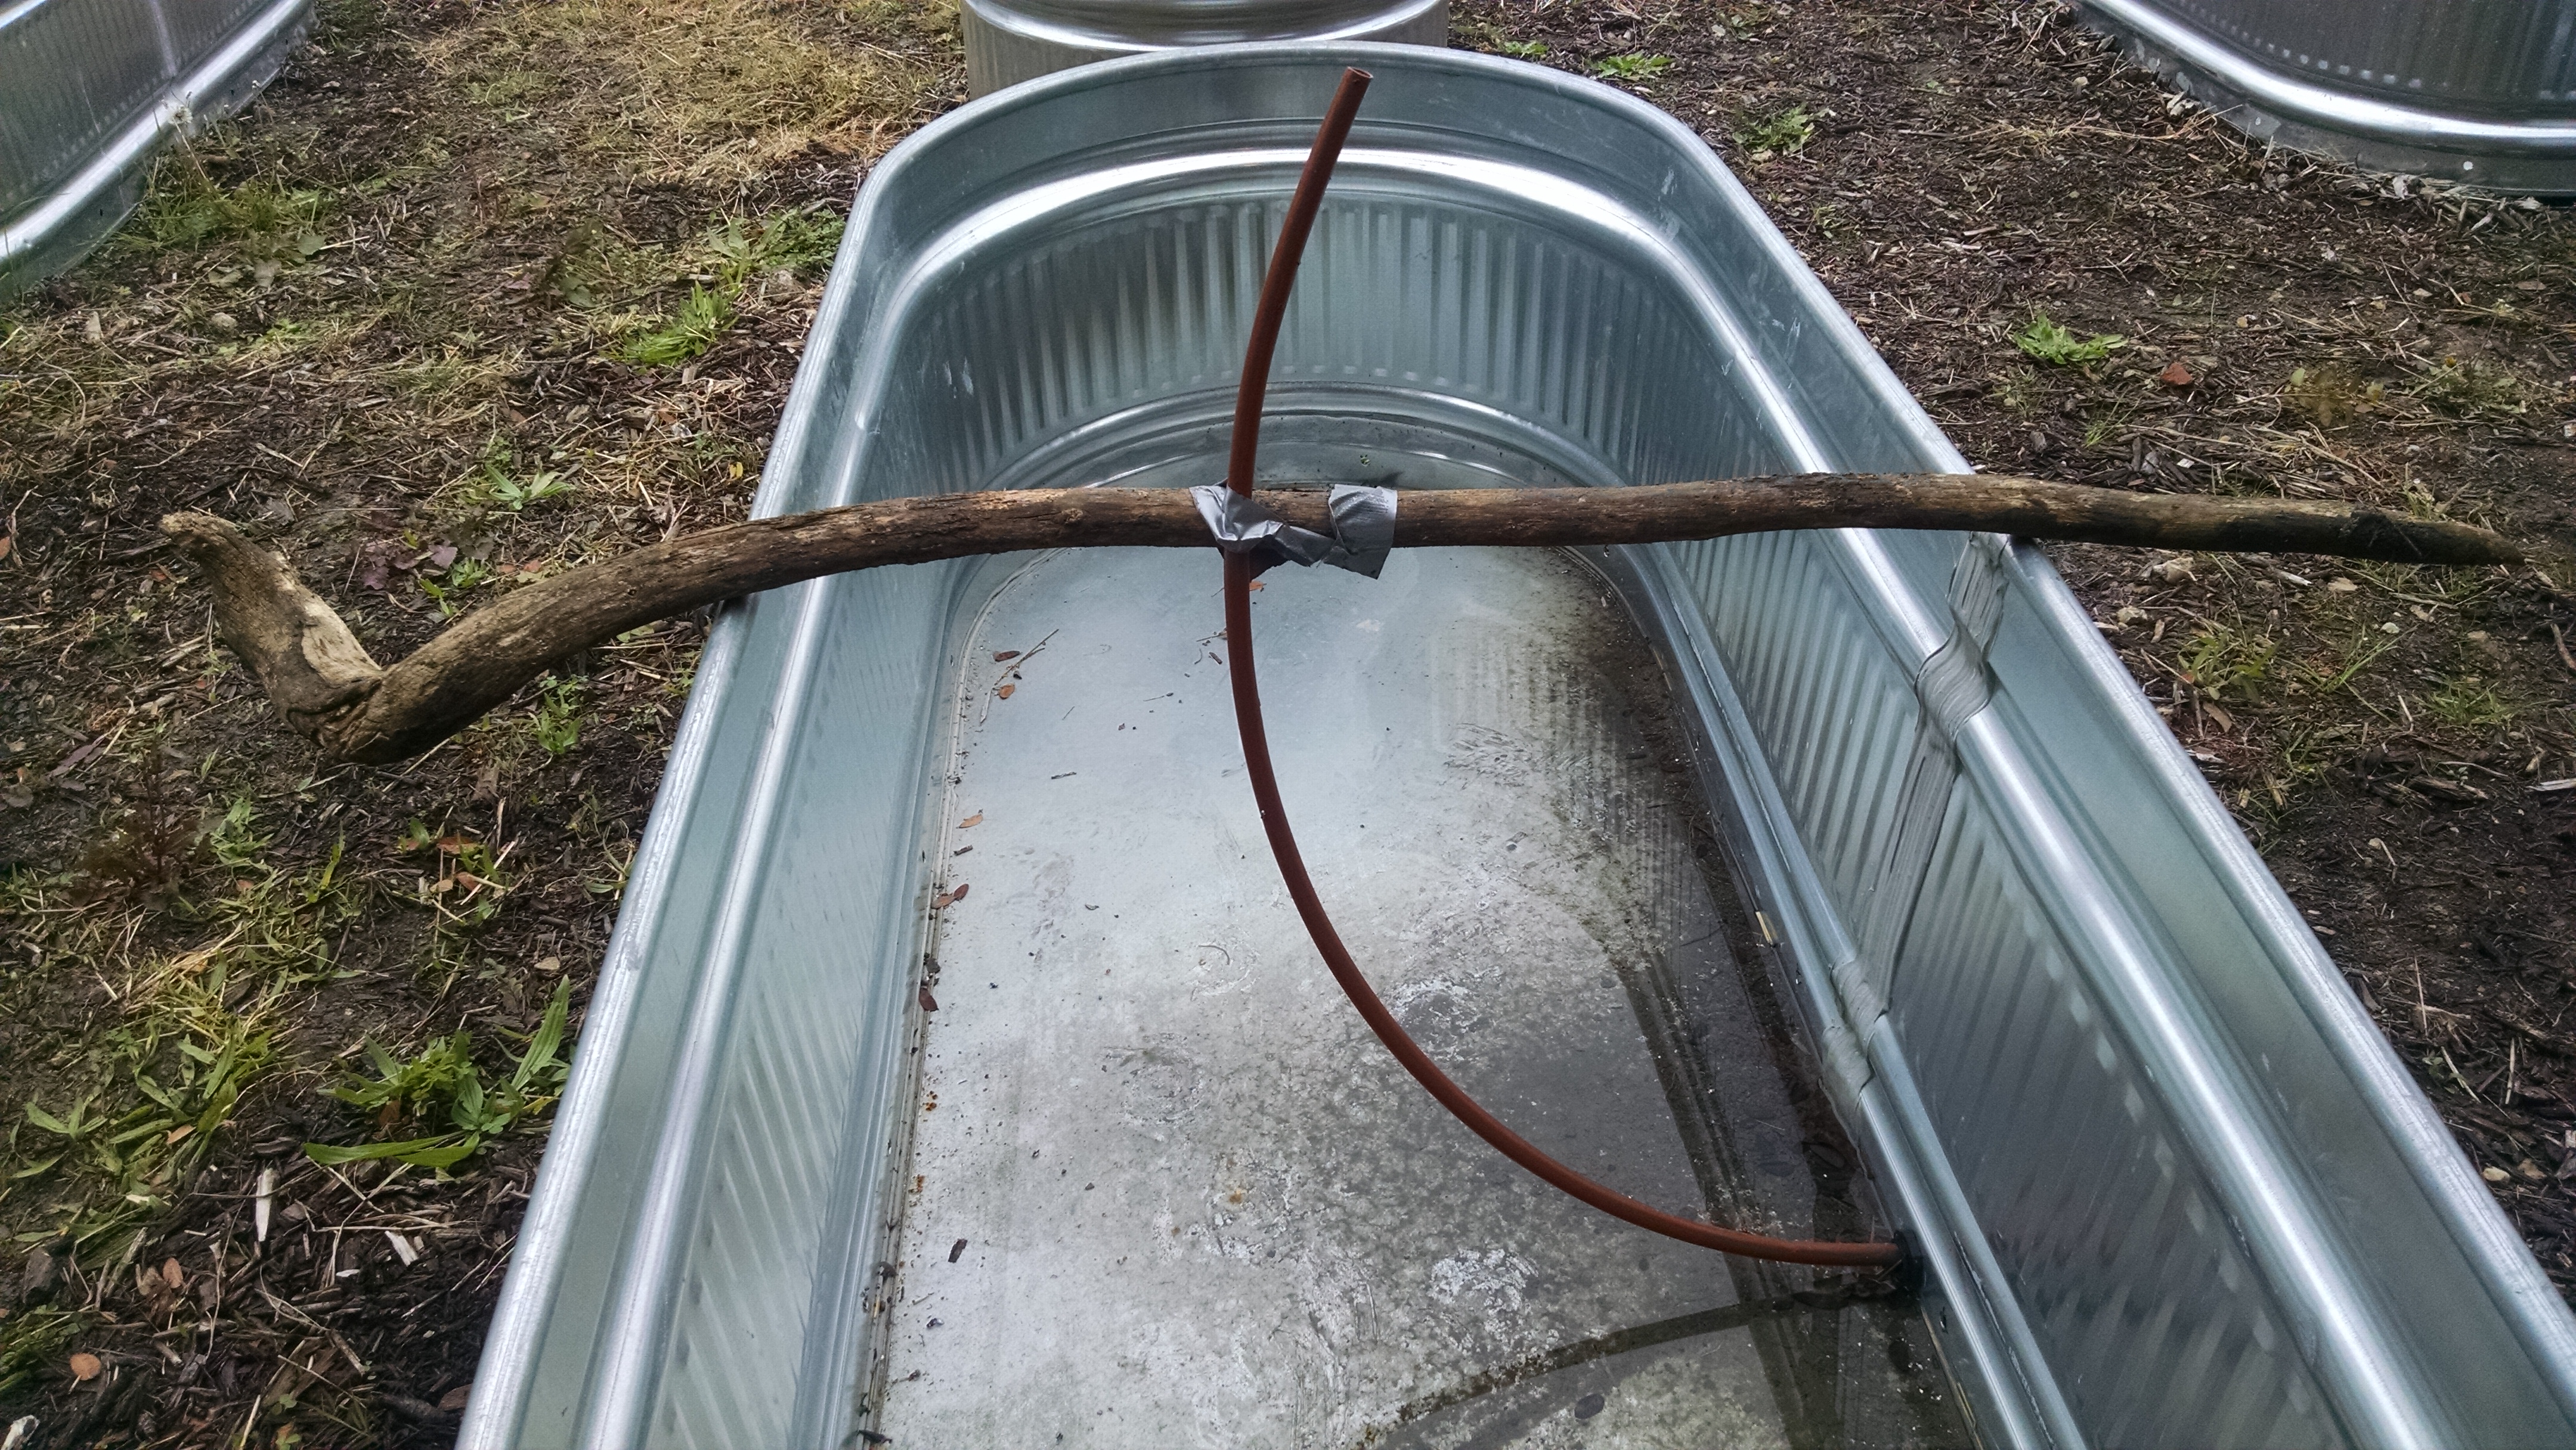
The containers had water lines already set and coming in from the bottom.  These had to be held upright so that we could connect drip irrigation at the top when the containers were filled.  We duct-taped the lines to a stick used as a cross piece.

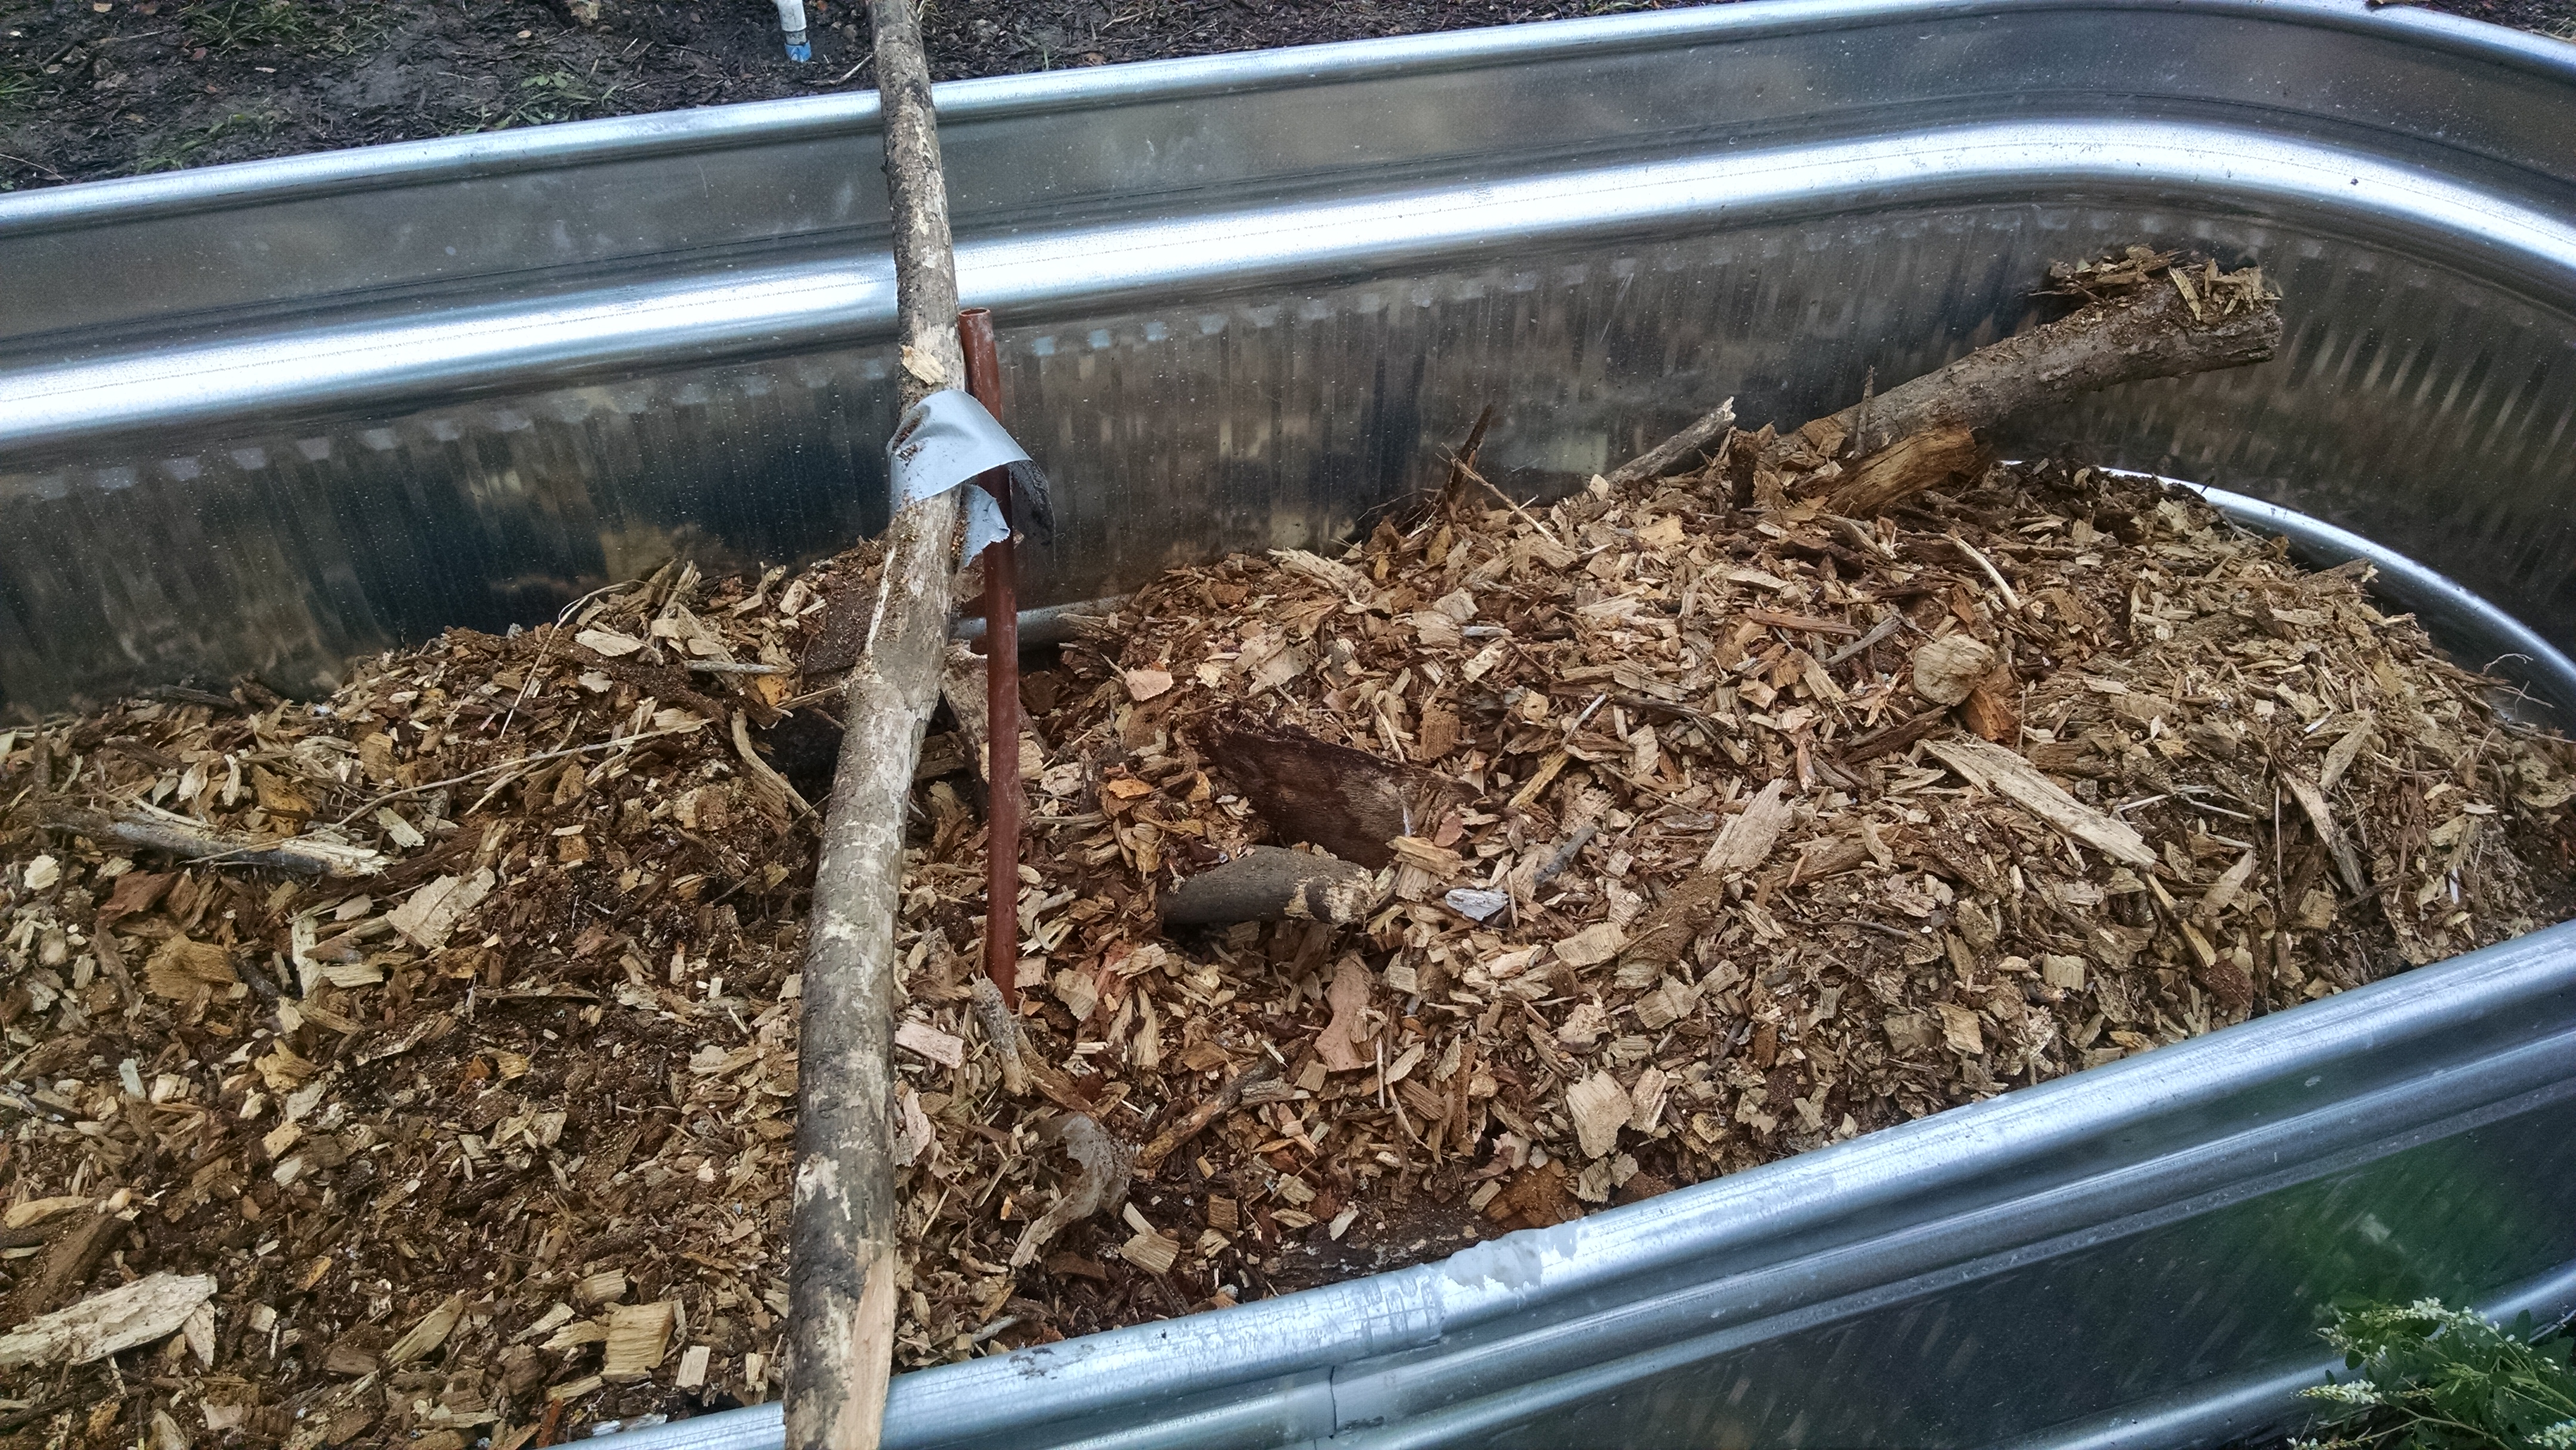
Next, we added logs and branches, cut to about 3′ lengths.  This filled in the bottom foot or so.  The wood was collected from an urban forest – it was downed wood, that was older – the best!  The wood will decompose, forming a wonderful habitat for micro-organisms, while also becoming spongy and thus holding water.

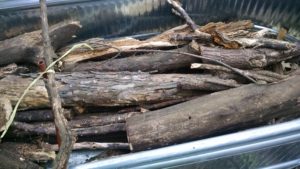
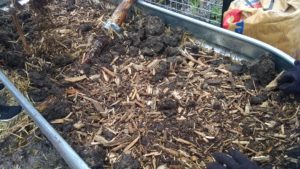
Then we needed to fill in the spaces between the logs – what better material than wood chips?!

We were generous with the wood chips, and then put in lots of leaves, which were watered in well.

We knew the containers were draining well when we watered in the leaves – all the leaves needed to be moistened, just like in a compost pile – because water drained out the bottom of the containers into the walkways.  These became a bit muddy, so we added woodchips to soak up the moisture.

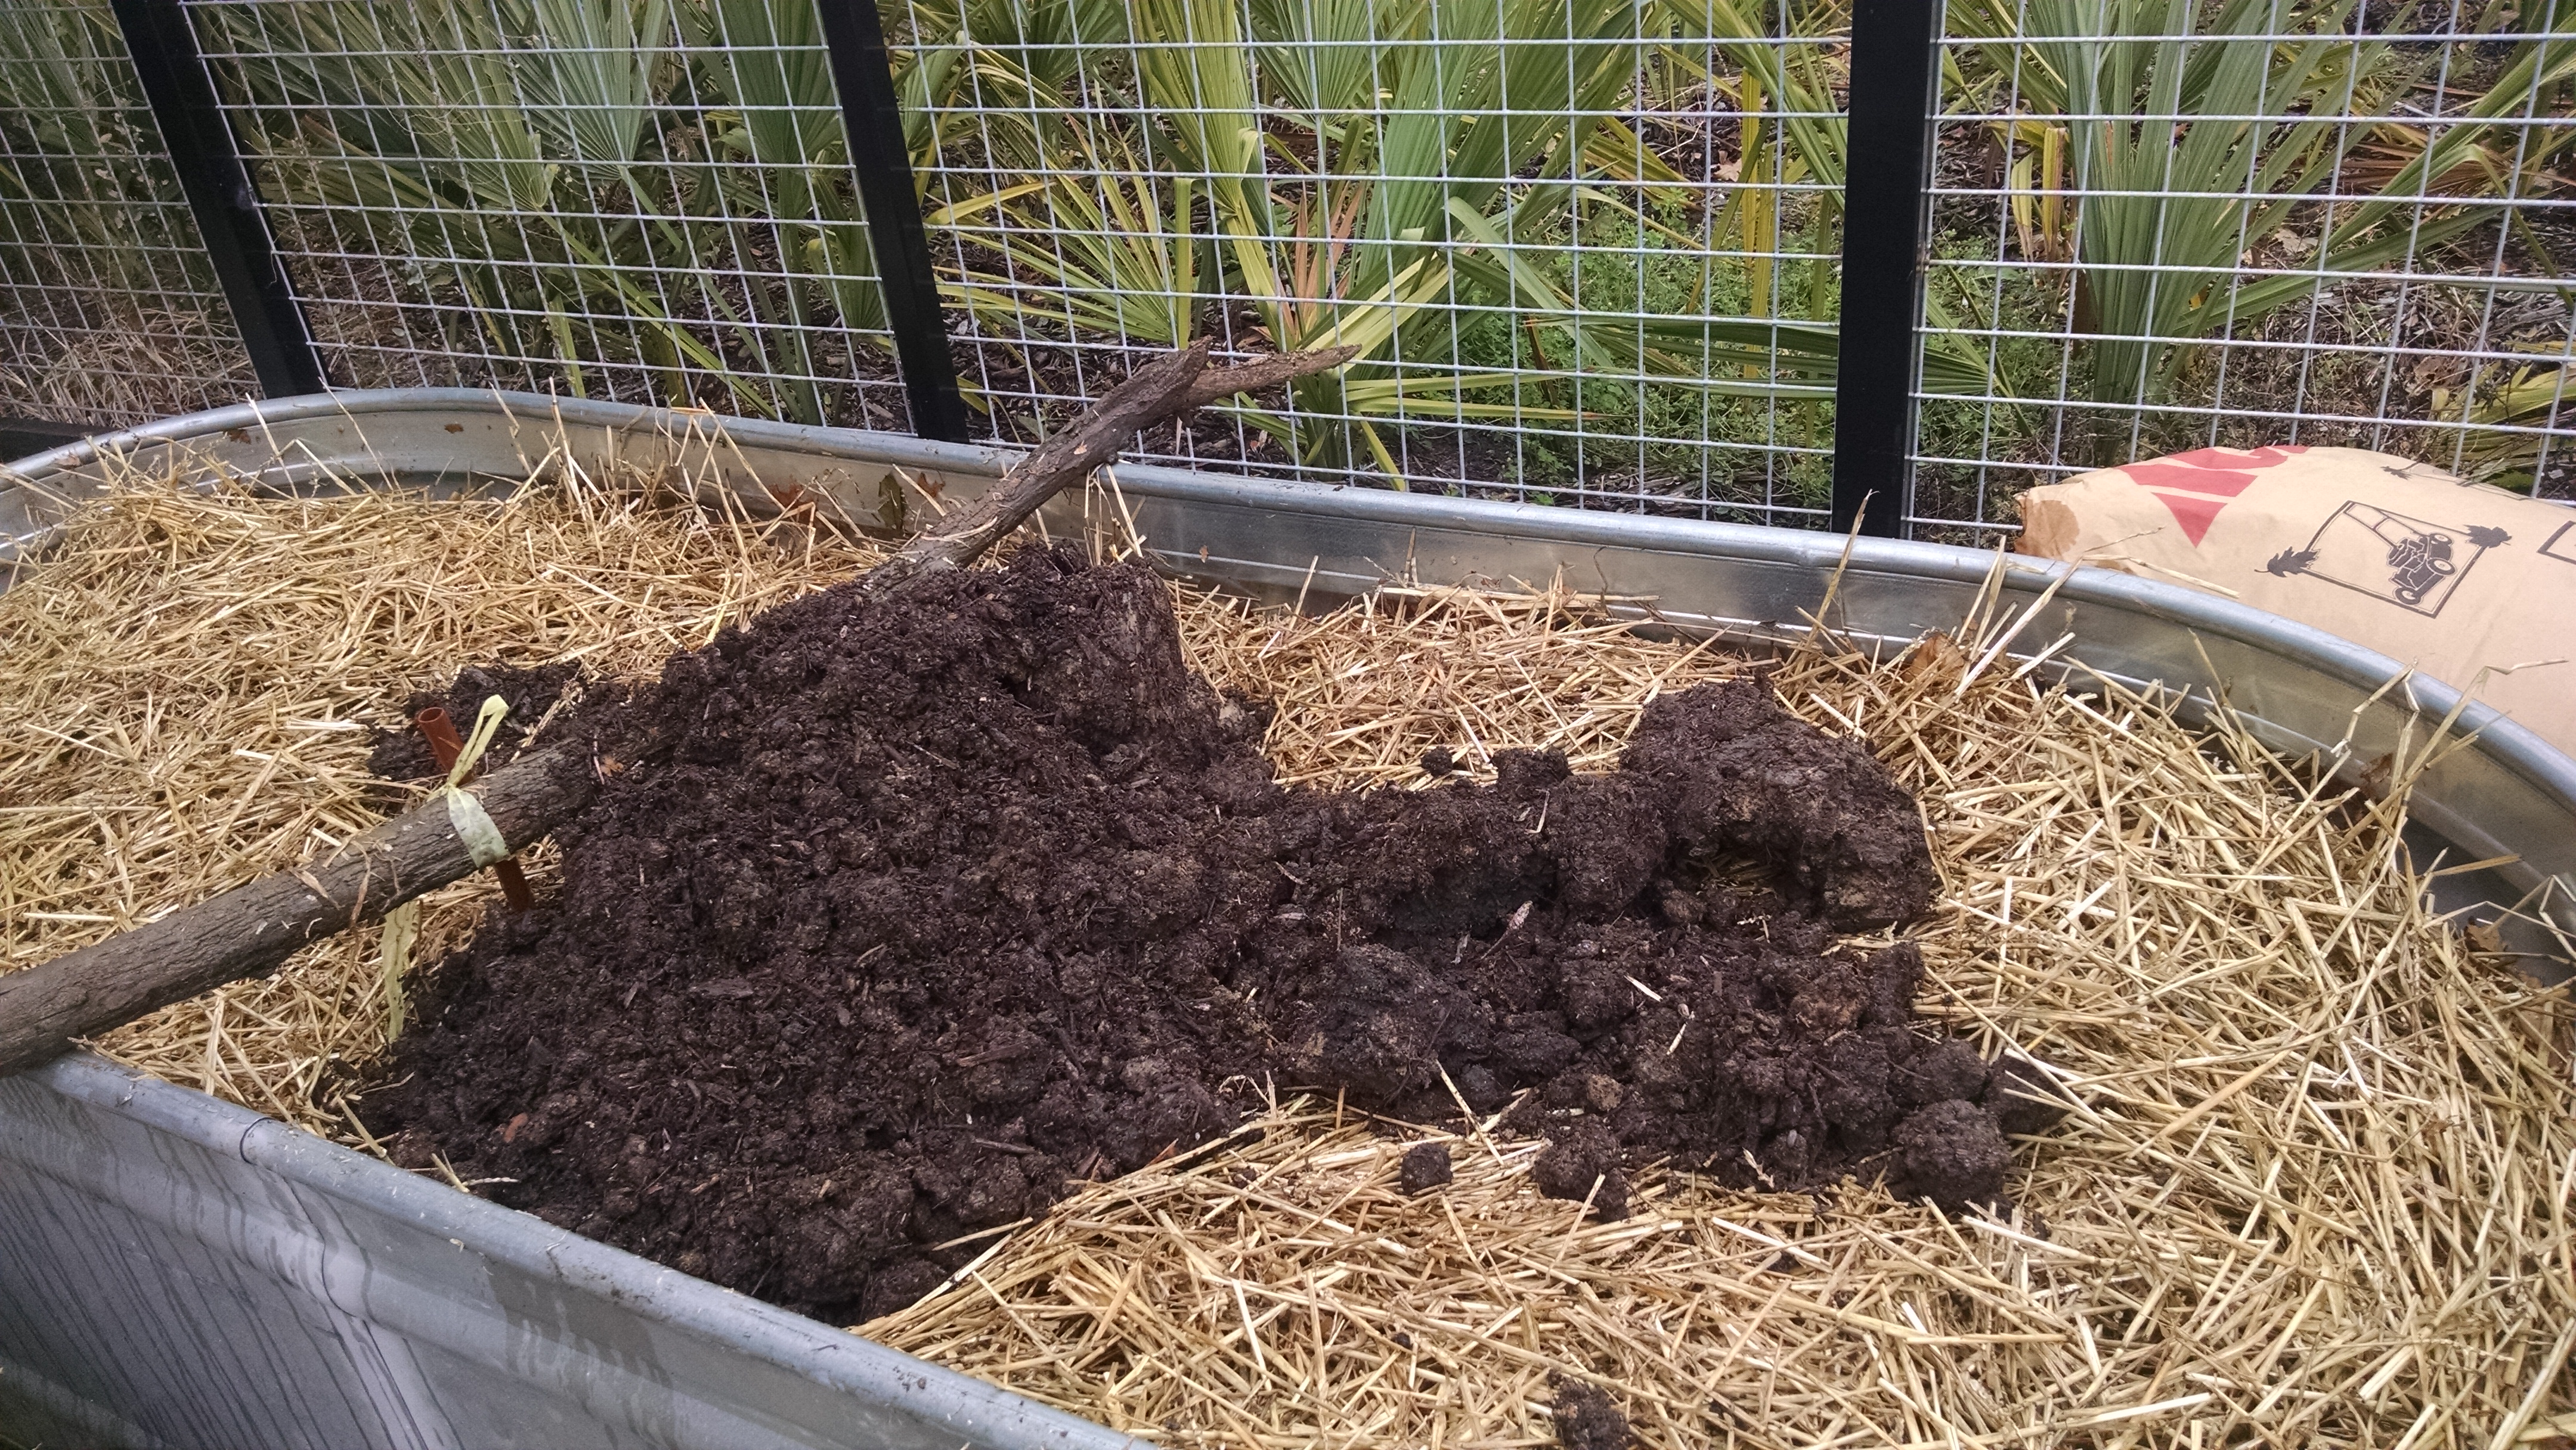
Our next step was to add more woodchips.  We watered again.  We added straw.

We noticed that a bobcat was leveling a site across the way from us, and the dirt it was removing didn’t look like black clay.  We went over to investigate, and the soil was mixed with woodchips – that had been put down on the site a year or so before.  We convinced the bobcat operator to share some of this woodchip loaded soil with us.  And we added it to the mix – it helped us innoculate the beds with native micro-organisms.

You can see that we are filling up the bins nicely.  Once again, we watered the bins to help compact the straw.  We had been working about an hour and a half (it went quickly with about 10 people working), and took a break while we waited for the top soil to arrive.

This was the only expense – 10 cu. yds. of organic top soil. The rest of the materials were scavenged or delivered free (ever wonder what tree trimming services do with the limbs they chip –  often they have to pay to dump them so they are very happy to provide free chips to folks in their area), or leaves nicely bagged and left at the curb for picking up by anyone.

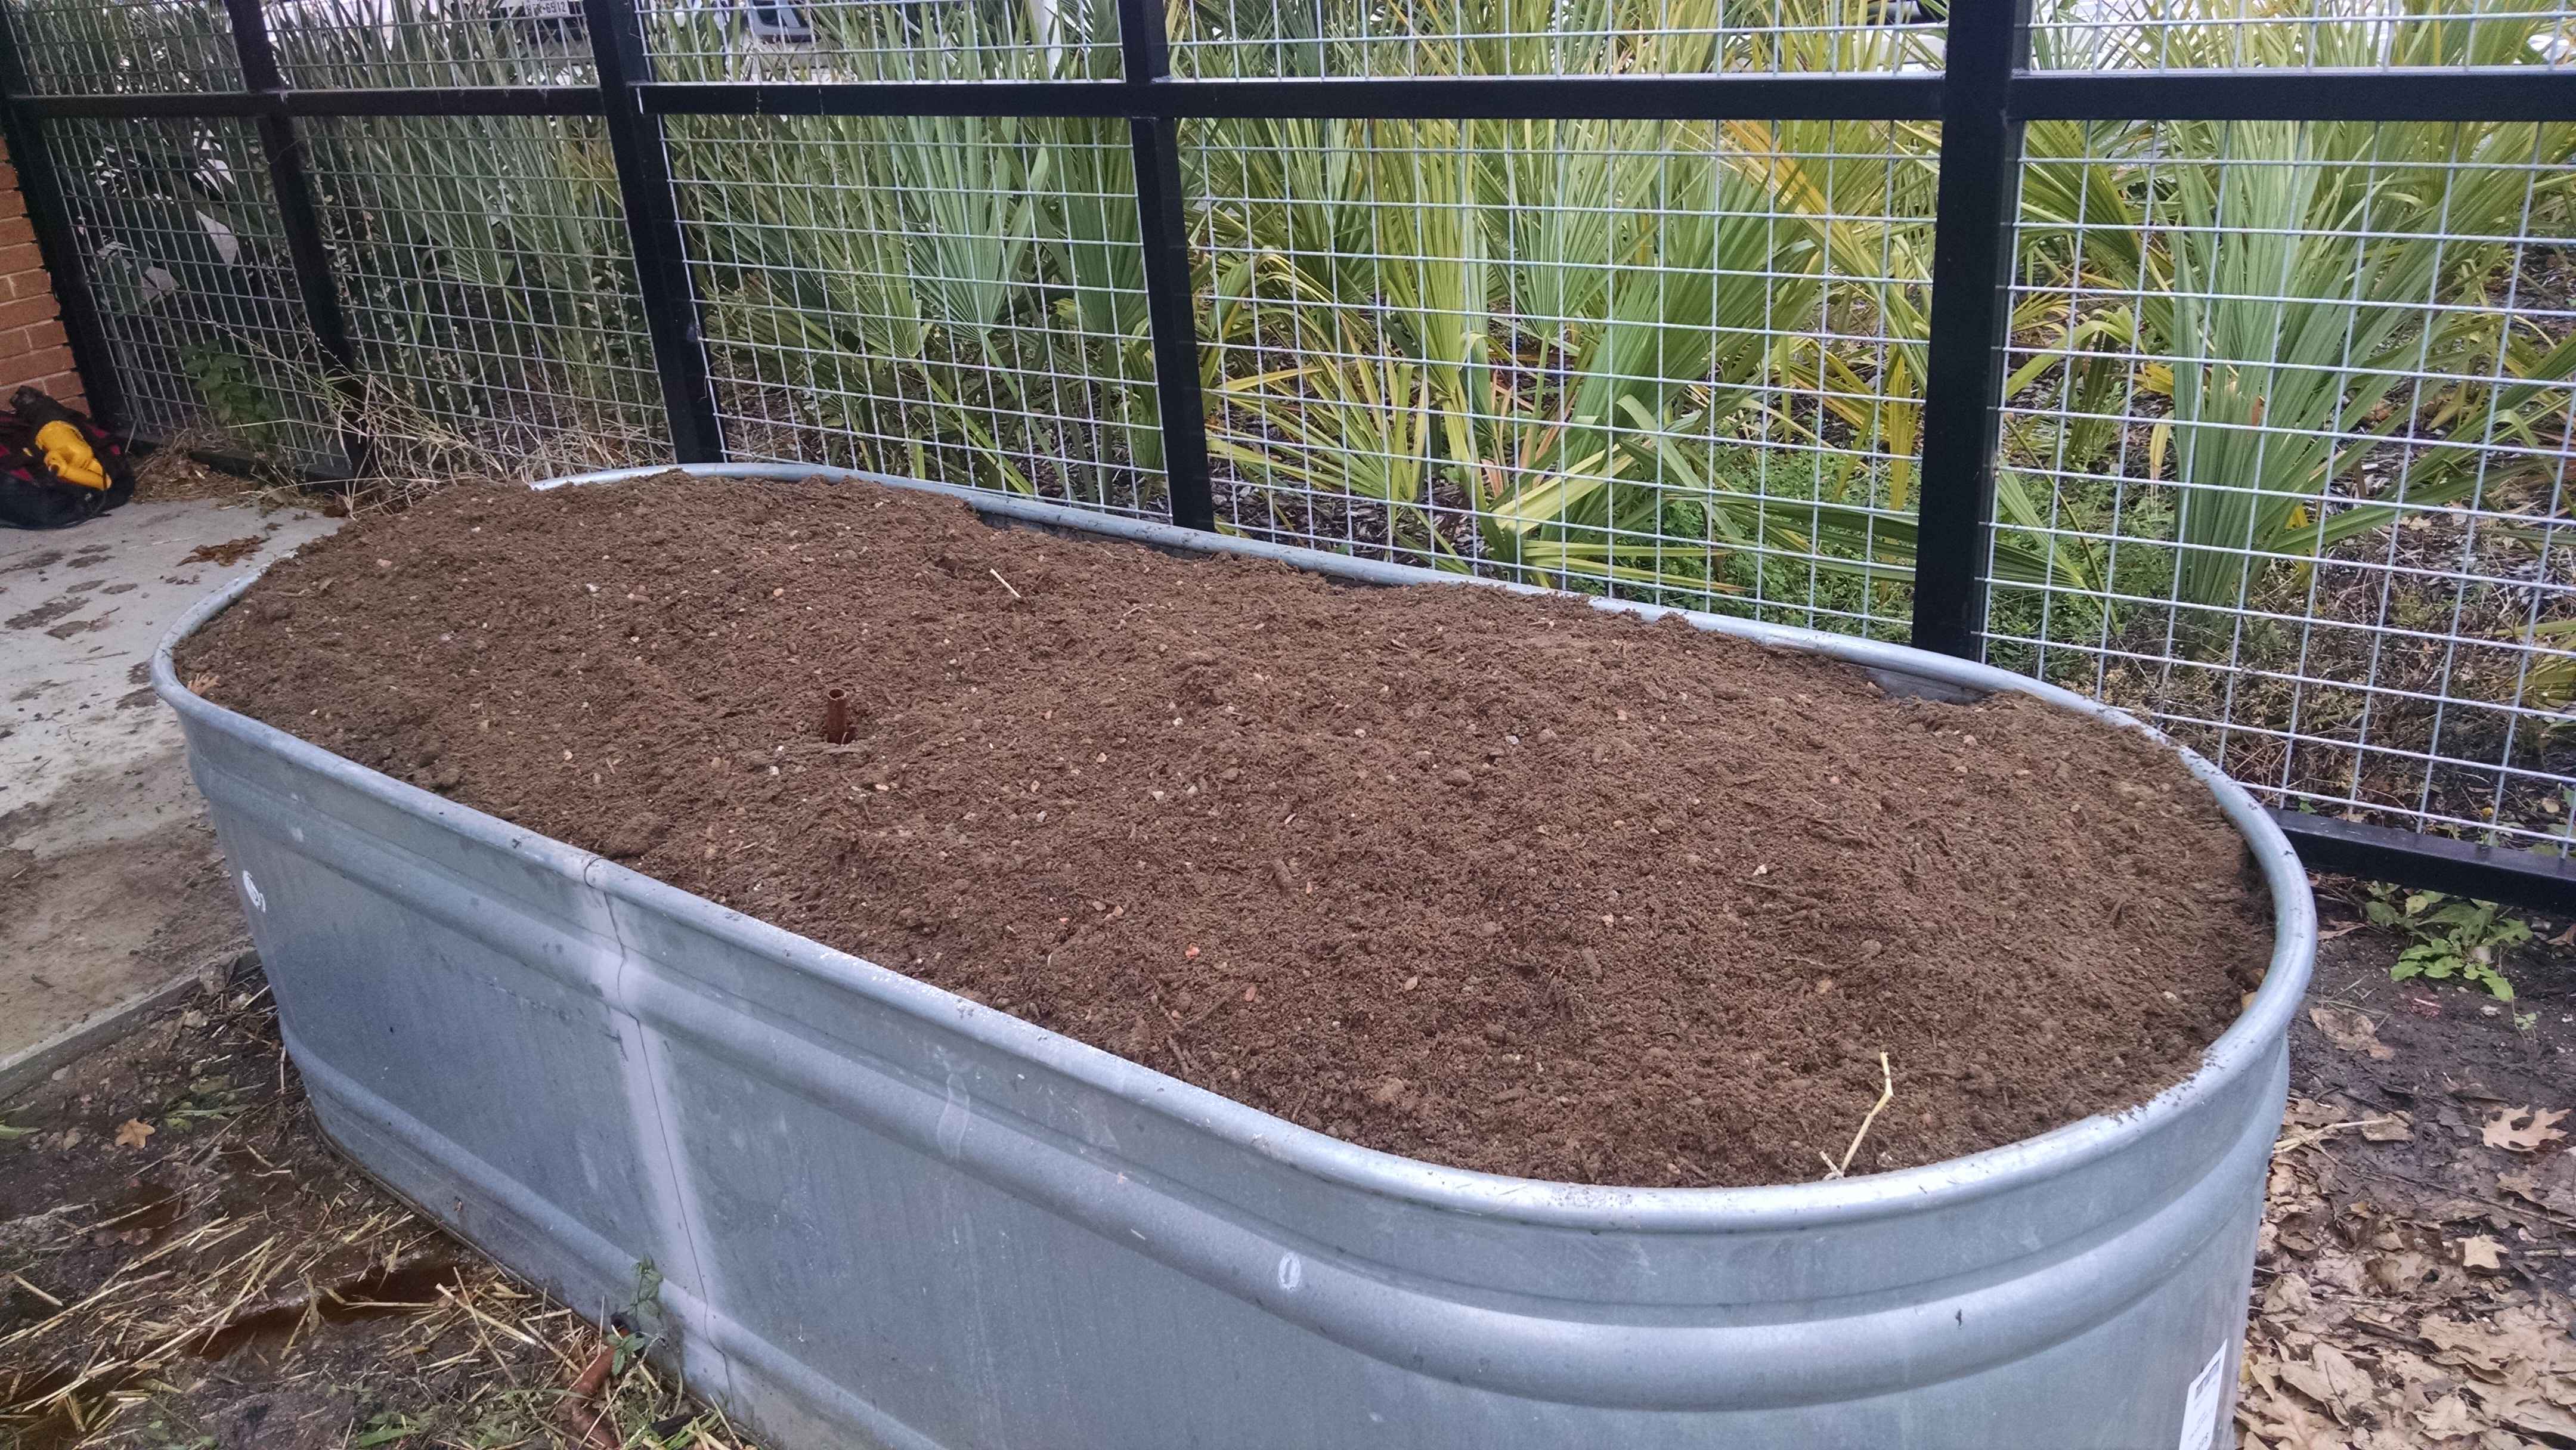
The top soil then was used to top up all the bins.  Doesn’t this look luscious and ready to plant?  But wait!  We need to add a couple of things to help these garden beds along – my favorite trio of Azomite (pelletized volcanic ash that provides essential and trace minerals to the soil), Wildroot mycorrhizal fungi to help the plant roots access nutrients in the soil, and worm castings (one of the best sources of bacteria for the soil ecology as well as fertilizer).

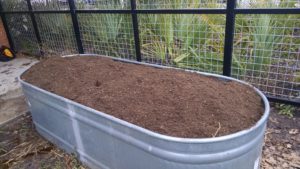
All that is needed is to set the top drip irrigation lines, and plant!

These beds will not need as much water as other raised beds because of the hugelkultur construction.  They will sink down as the organic matter decomposes – just like a compost pile – but then all one needs to do is add mulch and/or compost on top with every planting season.


Update on those late plantings

If you read my last post, you will know that I am experimenting – isn’t all gardening experimenting? And that’s what makes it really fun!

About 10 days ago, I planted seeds for broccoli raab, cauliflower, and collards and placed the 4″ pots in a wicking bed.  Well, yesterday (at 9 days) I checked them.

The broccoli raab had sprouted, as had the collards.  However, the cauliflower was having difficulty.  Since the cauliflower was on another wicking raft, I moved it to the raft with its cole buddies.  Also, I was told that sometimes it is necessary to top water till fully moist before the wicking is started – sort of like priming a pump.

Here’s a picture of the little seedlings!  It’s another 70 degree day today and tomorrow, with temperatures dipping into the 60s in the next couple of days.  But still not close to freezing.   I’m optimistic that I can grow them to transplant size.  Although, in the wicking bed I could easily protect them, while the water reservoir maintains a more constant temperature.

Note the bits of green to the left and barely visible in the middle.

Stay tuned….

Too Late to Plant? Maybe Not…

Various planting guides stop at about November, while others continue on through the winter, recommending what plants can still be seeded.

In the past, I’ve tended to plant my carrots as late as the first of November (when the tomatoes are dying back), and reap a harvest in February and March of great carrots that grew slowly but fully during the winter.  I’ve also planted turnips in October, to have very juicy turnips for Thanksgiving.

This year, I decided to try an experiment and plant (by seed) three crops even this late – I’m writing this November 17.  The three crops are winter-hardy:  collards, cauliflower, and broccoli raab.

I’m fortunate enough to have a nifty bottom watering container on the property where I’m renting.  See the picture.

If you have taken a permaculture course, you may recognize this concoction.  It is an IBC tote that has had the top third cut off, PVC pipe is inserted so that a greenhouse or shadehouse can be created; the tote has water in it, upon which is floating styrofoam rafts covered with fabric (wool or cotton).  The fabric wicks the water up to the top of the rafts, on which you place your pots with seedlings.  The next picture will show what the collards and broccoli raab containers look like, all floating on their raft.

So… I took some 4″ pots left from transplanting herbs into a garden bed, filled them with rich, rich soil from the keyhole bed I’d built (a compost pile by any other name) and which we’d broken down and salvaged the soil.

Then I planted seeds and soaked the seed medium.  Then I placed on the wicking raft.  I’ll watch the plantings for the next several weeks and see if they (1) sprout; and (2) become viable transplants this late in the season.

Stay tuned…..


SEEDING Dallas II is Next Saturday!

Our mini-conference on urban ag is scheduled for November 11, 2017, at the Owenwood Neighbor Space (formerly Owenwood UMC).  We have three tracks:  learning gardening, community garden management, and market gardening.

Registration is only $10, and it starts at 8:30 am, ends by 1:30 pm.

Here’s the link to register:  http://www.grownorthtexas.org/events

See you there!

Gardening: Fall into Winter

I’ll be teaching gardening through the winter on October 7, Saturday.  – Watch Trinity Haymarket’s website and/or Facebook page for location.


We’ll discuss ending the summer garden with seed saving; what to plant through fall into winter that will winter over; and preparing your soil for the best spring garden ever.  Bring your questions!


Update: Retirement Home for 4 Hens

UPDATE:  The hens have a home in a lovely retirement community at Eden’s Organic Garden Center!  They are calm, happy, and in retirement (except for the occasion egg they choose to lay).  Here’s an updated picture of them in their new habitat:

In Search of RETIREMENT HOME for 4 hens (ages 4 and 5). (email Anita@AnitasArbor.com if you would like to inherit these hens) The hens have been together since 2013, and even the oldest is still laying occasionally – in spring we are covered up with eggs.  They have all been fed organic feed since they were peeps.  They are:

Winnie:

Winnie came from Peace and Love Farms in 2013, and resided at Urban Acres Market for a year before coming to live with me.  She is about 5 years old. She is an Ameraucana and is anoble gray with a long neck. She is shy of people, and is the last to emerge when the greens (chard, bok choy or tatsoi), scratch, and chunks of pear have been spread out. She lays eggs with a tint of green.


Mavriki (Mav for short)

Mavriki is Greek for “little black one.” She is an Australorp with irridescent black feathers.  She came to me as a peep in November of 2013. She lived at Urban Acres will late 2014 and then came to live with me. She was the one who noted, after the move, that they were in a different place and tried to alert the others, who were too busy pecking and scratching for grain. She alerts me to something that needs attention – like when another hen, Fancy Pants, got sick. Shen Fancy Pants the one who brooded eggs, died, Mav took over the task of brooding – trying hard to hatch that fake egg!  She likes organic produce, and frozen peaches. Her eggs are brown.


Aurie and Rosie (O’Grady, as in Nosey Rosie O’Grady):

Aurie is an Ameraucana, and her eggs are blue tinted. She is the middle hen in the picture. She came to me as a peep in November of 2013 and was raised at Urban Acres, then came home with me in late 2014. She is pretty calm and lays throughout the summer, when other hens take a break. She delights in watermelon, and particularly frozen watermelon in the summer.

Rosie is also an Ameraucana, and lays light rose-colored eggs. She is the hen on the right in the picture. She was also raised as a peep from November 2013 until coming home with me in late 2014. She gets her name because she was the one, from about 2 weeks of age, who was curious every time I went into the coop. She watched me and inquired as to what I was doing. She continues to do so to the this – she will watch me while others are indulging in the goodies I bring. She, along with the others, love the heads of broccoli.

A note in memoriam – the hen at the left of the picture was Ginger. She is recently deceased.  She was the Rhode Island Red, and was head hen. RIP, Ginger.


Thoughts on Downsizing

The challenge:  to prepare to lie in a furnished 600 square foot guest house, when I’ve been living in a 2800 sq. ft. house for 36 years!

It is an emotion process, because as I sort, memories of past event and people come flooding in. Remembering past passions and interests. Remembering the stages of growing up of my children.

So I perform triage:  what do I absolutely, positively need to be happy and useful in the new place? What will I need immediate access to (for classes, ongoing research), and what can I do without in the long term?

And I know I’ll do another sort after I move.  I know I’m packing too much to take with me.

It’s a process of letting go. Even though I’m still curious about a subject, if I haven’t read the book since purchasing it in 2003, what is the probability of my doing so in the next 5 to 10 years?

I’ve sorted fabric, and keep finding little sewing kits assembled for some project. I know I won’t be making lace shawls (I’m into simple, mindless knitting), so I don’t need the books and patterns for elaborate constructions.  I won’t be doing elaborate quilts, either.  And those knitting needles that seem to multiply in various corners (did I really know I had at least 6 sets of size 6 needles?), well it took me two hours to sort through and size them all and set about half aside for an estate sale.

But no matter how much I’ve sorted and boxed, it seems there’s SO much more to do! The house just keeps getting bigger and bigger, with more and more rooms!

The result will be simplifying my life.  That is a laudable goal, and one which I have been preaching for a long time.

But it’s a challenge – with a deadline, because the papers have been signed, and agreements made.


Chickens’ Laying Oddities

I am owned by five hens – three Ameraucanas, one black Australorp, and one Rhode Island Red.  The youngest are now about 3 years old, the oldest, one of the Ameraucanas, is about 4.  But all still lay at some rate or another.

I noticed, however, that two were laying pretty regularly in December – Auri (blue eggs) and Ginger (brown eggs).  But in January two others took up the torch while the others took a break – Mav (brown eggs with deep brown speckles) and Rosie (pinkish brown eggs).  In fact, Mav and Rosie are still laying as I write thise.

HOWEVER, the other day, Mav’s egg was rather odd – as you see in the picture.

You will note that the egg on the left is the size of a marble.  This is not something Mav had laid before.  It was perfectly formed, and had that speckled look just like her regular eggs.

So I cracked it open to see what was inside, and it appeared perfectly normal, with a small, almost forming yolk.  The white had a good consistency.  It’s hard to see – I cracked it into a white bowl, and a light keeps reflecting on it.

I asked my local chicken expert and he said – it just happens sometimes!  Doesn’t indicate anything is wrong.

In fact, the next day she laid an egg that was perfectly normal, so I guess all is well in the coop.

One thing that must be remembered – chicks often take a break over winter or when the weather is wonky like we have had lately here in Dallas.  Or when they are molting, or move, or otherwise their world is disrupted.  But usually egg laying subsides markedly in the winter.  And then … Groundhog Day comes … and the laying starts picking up.  It’s really not magic, and don’t go looking for a calendar in the coop, where the hens are keeping track of the days.  It all has to do with the length of the day – the number of hours of daylight.  As the daylight increases, so does laying.

So… keep those hens happy and enjoy the eggs!